Showing posts with label RitR. Show all posts

Monday, August 11, 2025

The Objective Files – Part 3: Rebellion in the Rim


Now we arrive at the final set of published objectives: the 12 new cards introduced in Rebellion in the Rim.

And you know what? They’re actually pretty good.

It’s almost as if the designers at FFG finally sat down and asked: 

"What kinds of objectives are missing from the game? What holes are there in the current meta? And what would be both fun and competitive to play?"

The result is a surprisingly solid set of objectives. Some of these (Infested Fields, Volatile Deposits) have become staples in tournament lists. Others offer fun, flavorful mechanics with tactical depth—something the game needed more of. The only one I actively despise is Hyperspace Migration, and the only total dud is Fleet in Being, and that one isn't that bad, just not good 😆

This set also introduced three new obstacle types, all of which are tied to specific objectives:

  • Gravity Rifts, which pull and push ships in dangerous ways.

  • Space Slugs, which eat squadrons. (It’s in the name.)

  • Space Whales, which move around and really don’t like being landed on.

Finally, keep in mind that RitR may have been designed primarily with a half-sized play area in mind. That may affect how some objectives scale to full tournament play, and we’ll flag it where relevant.

⚔️ Assault Objectives (Red) – Rebellion in the Rim

Unlike Corellian Conflict, the red objectives in RitR don’t suffer from outright bad design. None are broken. None are total garbage. Instead, they lean toward creative and thematic—though not all of them reach competitive viability. Let’s dig in.


Ion Storm
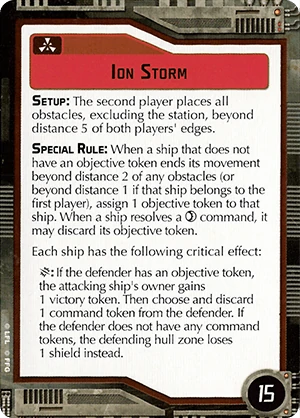
Tactical: Setup control of obstacles, slight edge later.
Scoring: Modest and contested.
Play Rate: Underused but not totally absent

This objective is solid. Second Player places all obstacles, which can be a big edge for terrain-heavy lists. Removing the station also helps certain builds. There’s real value here, but the actual scoring impact is pretty mild, and the interaction is often too subtle to justify the pick.

Fixes:

  • Require spending 2 engineering points to remove an objective token, instead of removing it for free. This adds cost and weight to the decision.

  • Optional: Introduce "Energy Fields" (a renamed version of dust fields) to spice things up:

When a ship ends its activation at Distance 1 of an Energy Field, its owner must discard 1 command token and suffer 1 damage.
Squadrons suffer 1 damage instead.

This isn’t necessary—but it would make for a fun thematic twist.

Verdict: Fine as is.


Marked for Destruction

Tactical: Basically nil.
Scoring: Hard to achieve.
Play Rate: Very low but not zero

This is one of the most thematic objectives in the entire game. It’s fun, but even when played well, it's hard not to think another objective would have been better. It's not far from being good, however. If you've played it in RitR you're likely to have a rather higher opinion of it, as the smaller map makes the dust fields and space whale movement more impactful, and the scoring opportunities more frequent.

Let’s see if we can fix that without overcomplicating things or changing the flavor too much.

Fixes:

  • Second Player places the objective token after fleet deployment, letting them bait or threaten better.

  • Require the Purrgil to always move toward a token if it exists. Prevents it from floating off into irrelevance.

  • Ensure Ezra and similar effects can interact with the token—it’s thematic and encourages creative plays.

This won't do much, to be honest, but I'm out of ideas without a radical rework.

Verdict: Worth saving.


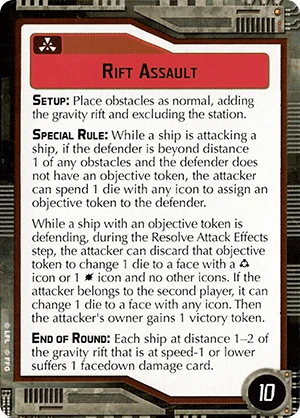
Rift Assault

Tactical: Dice fixing edge to the 2nd player.
Scoring: Usually moderate and balanced.
Play Rate: Sometimes.

There’s not much wrong here. It introduces a fun, dangerous Gravity Rift, has real counterplay, and both players can score—the Second Player’s edge is slim, which is probably a reason you don't see this too often.

Fun fact: This objective is slightly less strong in RitR since the obstacles are more packed and it's thus easier to avoid the special rule.

Verdict: Leave it as-is IF global objective scoring gets capped or rebalanced as suggested in earlier parts. Otherwise, its “fairness” becomes a liability compared to higher-swing alternatives.

Verdict: One of the better designs. Let it breathe.


Surprise Attack

Tactical: Debilitating setup and raid.
Scoring: None.
Play Rate: Sometimes.

This one’s fine mechanically. It is, of course, stronger with TF or in an Interdictor/Onager combo (but you don't see too many of those ATM), but overall it's not wrong to force deployment of the enemy flagship AND hand out tons of raid. Raid might not be that powerful, but you get a lot of it for free.

But let’s be honest: in practice, this can lead to three rounds of the first player running away/stalling, followed by each side's attempt to get ahead in score. 

Verdict: Balanced and occasionally excellent. Just… not that fun sometimes.

🚢 Navigation Objectives (Yellow) – Rebellion in the Rim

The yellow objectives in RitR are an interesting mix of tactical rewards, positional play, and scoring. There are some issues, however. Abandoned Mining Facility can lead to runaway scoring. Fleet in Being is a dud. Rift Ambush is tuned for the campaign's 3x3 play area. But with a few tweaks, I think the yellows can be brought into compliance.


Abandoned Mining Facility

Tactical: The usual slight advantage in obstacle placement and whale movement.
Scoring: Can be extreme.
Play Rate: High in token-farming builds.

This is a very strong yellow objective. The combination of reliable scoring and some battlefield control makes it quite popular. 

Optional tweaks:

  • Introduce a scoring cap (e.g., 80–100 points).

  • Optionally, require First Player to move the space whale toward the nearest ship. I often see the second whale just being sent off to one side. But not really a needed fix.

Verdict: Still one of the best yellows. Minor guardrails might keep it from being oppressive.


Asteroid Tactics
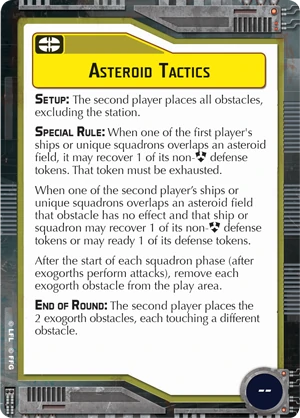
Tactical: High.
Scoring: None.
Play Rate: Moderate.

This is a clean design. Solid tactical buff for Second Player ships that fly smart, and a significant boost to your squadron game if you can use the board and slugs well. Some fleets benefit more than others, but that's why we have many objectives to choose between. Rewards good obstacle placement and maneuvering.

Verdict: No changes needed. One of the best-designed yellow objectives.


Fleet In Being
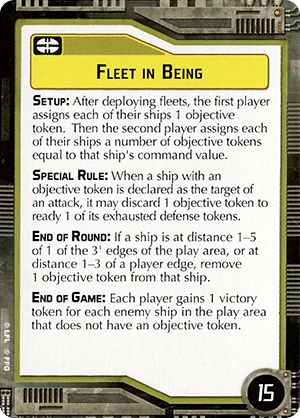
Tactical: Defensive support, in theory.
Scoring: Slight.
Play Rate: Rare.

This one should be good. It screams "bring me Obi-Wan, Thermal Shields, and a Shield Tech." But in practice, it underperforms. Either the tokens don't get spent, or the tactical benefit doesn't quite materialize.

Two suggested reworks:

  1. Scoring Layer:

    • At the end of the game, each player scores 10 points for each of their ships that retained at least one token.

    This rewards disciplined play and creates a mini-game around conservation. Still meh tho.

  2. Radical Rework:

    • When spending a redirect token, you may also spend a token targeted by an accuracy icon.

    Yes, it’s spicy. But it could be a powerful mechanic for token-centric fleets, especially if paired with Obi-Wan. But I suppose, as usual, it would actually be Lumi who benefits more. She's a cool commander, but she really does impact design space.

Verdict: Needs help to be viable.


Rift Ambush

Tactical: Total obstacle control and slight advantage around the rift.
Scoring: None.
Play Pattern: Can fizzles at 6x3 scale.

This was clearly designed for 3x3 RitR play, where maneuvering is tight and every early shift counts. On a full board, its impact is often reduced—it does offer some board control, but it is not enough to make this a mainstream objective.

Full-scale tweaks:

  • Increase Gravity Rift effect range to 1–3 (or even 1–4, though this is pretty huge) to compensate for board size.

  • Allow Second Player to reposition TWO enemy ships at the start of the game.

These changes let the objective retain its campaign flavor while having teeth on a standard map.

Verdict: Great concept. Needs full-table tuning to shine.

🛡️ Defense Objectives (Blue) – Rebellion in the Rim

RitR’s blue objectives are a big step up from the chaos of Sensor Net and Navigational Hazards. These cards explore positional pressure, obstacle interaction, and movement across the board in ways that feel dynamic and—mostly—fun. Still, a few need tweaks to bring them up to full-table standard.


Doomed Station
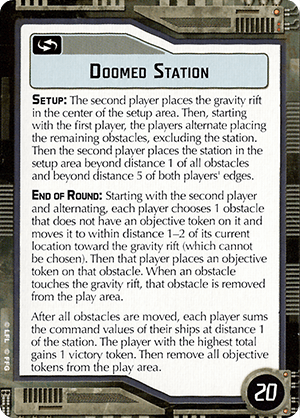
Tactical: None unless you count obstacle movement.
Scoring: Strong if not contested.
Play Rate: Underrated.

This is essentially a blue-flavored Contested Outpost, but with moving parts and less obvious counterplay. It’s solid and thematic—but it rarely makes the cut because Infested Fields usually does the same thing better.

Suggested tweak:

  • After placing the Gravity Rift, the Second Player places the first obstacle.

It’s a small buff, but one that gives obstacle-heavy lists a slight edge—and encourages a closer look at this often-overlooked card.

Verdict: Playable. Just needs a nudge to rise above the pack.


Hyperspace Migration
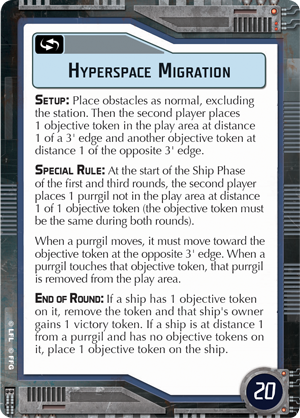
Tactical: Zero.
Scoring: Toxic.
Fun Factor: Stop. Please stop.

This card is infamous—Strategic token-farming at its worst. The whales just bump into ships while Second Player hoovers up tokens. Yikes.

Salvage attempt (full-scale revision):

  • Tokens must be placed in opposite corners of the setup area, not the play area. 

  • Purrgills thus must move across, not along the edge of the table.

  • Increase Purrgill speed to make the migration feel meaningful and force engagement.

This reimagining restores the "migration" feel and breaks the static loop of corner farming. Will it be perfect? No. But it might be tolerable. On the other hand, where is the second player's advantage now?

Verdict: Currently awful. Needs a thematic overhaul to become fun again, but this might not be it.


Infested Fields
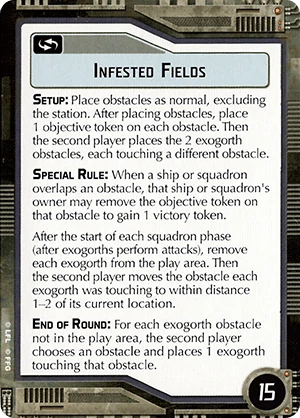
Tactical: High, obstacle movement, and slugs.
Scoring: Usually max 15 points to one player.
Play Rate: Very popular.

This is one of the best blue objectives in the game. It's tactical, thematic, and not easily abusable—plus, it punishes bad squad placement and rewards smart play.

Verdict: Leave it alone. It’s great as-is.


Volatile Deposits
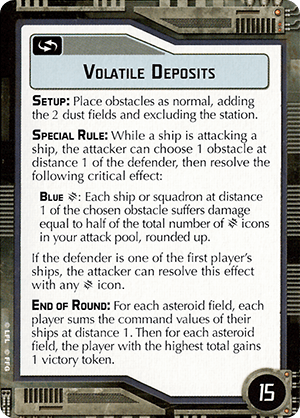
Tactical: Definitely a thing, although not the main thing for this objective.
Scoring: Net 15 per round for the 2nd player for much of the game.
Play Rate: Decently high.

This objective creates a real “tension zone” and encourages bold plays. Scoring is impactful but not out of control—at 15 points per token, you can gain or lose a significant lead based on area control.

Optional tweaks:

  • Add a scoring cap or limit the total number of tokens.

Verdict: One of the best objectives. Consider a cap—but don’t over-nerf.


🧭 Closing Thoughts – Rebellion in the Rim

Compared to previous expansions, Rebellion in the Rim stands tall. It’s clear the designers made an effort to fill gaps in the objective pool, creating cards that were fun, flavorful, and competitive. Token-farming is still present, but much more reined in than in the Corellian Conflict era. Strategic abuse is no longer the defining feature of every yellow and blue objective.

That said, some cards (Hyperspace Migration) were clearly built with the 3x3 RitR campaign format in mind, and don’t translate well to full-scale play. Others (Fleet in Being, Marked for Destruction) are strong in theme but weak in execution—yet perhaps salvageable with light reworks.

All in all, RitR brought some of the best-designed objectives to the game—and with a few tweaks, its weakest cards could rise to the same standard.

All in all, RitR brought some of the best-designed objectives to the game—and with a few tweaks, its weakest cards could rise to the same standard.


🔜 What’s Next?

That wraps up our tour of the 36 printed objectives in Armada. In Part 4, we’ll zoom out and look at the big picture:

  • What’s missing from the current objective pool?

  • Which objectives are tournament staples—and which ones should be?

  • How could ARC approach objective rebalancing in a post-RitR world?

  • Should we design entirely new objectives, fix the ones we have, or leave them the hell alone?

We'll also compile a Top 3 per color, a "Needs a Fix" shortlist, and a few wild ideas that ARC might consider in the future.

Stay tuned.

Tuesday, July 27, 2021

Rebellion in the Rim pt. 9 (Round 8/2nd and final pivotal)


We finally wrapped up our RitR campaign by making the 2nd pivotal the final battle. People were pretty much fed up playing the same lists over and over against the same lists over and over. 

Observation: if teams don't attack enemy bases, each act has too many rounds. And 3 pivotals are 2 too many. In this regard, the number of battles in CC is much, much better. I think we played 5 rounds and then had the final battle. With RitR we had 6 rounds and 2 pivotals and were still supposed to play 1 more act.

Anyway. Rebels managed to win the base assault (3rd battle of the last round) with a small margin. Something about an allied CR90 and some flotillas that just refused to die. This loss took away our ally source. I'm confident we could have gotten it back next round but since we went directly for the final assault that didn't happen. It brought our scores close, 11-10 Empire-Rebel. And with Rebels guaranteed to do a Demo of Force, we could at best get a small win. Kind of weird that only the assaulting team can score more than 1 point. Another little RitR quirk.

It also so happened that we hadn't really read the rules all that well, so we were a little surprised when the Rebel team triumphantly declared they now could use TWO ally tokens (as if ally tokens aren't OP, to begin with). One to upgrade a large ship. And one for the regular ally effect. That felt a little gamey - and very much like a clever trick to get an advantage.

But whatever. We grumbled a little but went ahead with the battle. We used our Shipyard token to upgrade to larges. Mostly for fun. The VSD turned into an ISD. That was a pretty good conversion. I dumped some squads and both flots to take a near-naked Onager. Without superweapons. The Testbed was the only large I could afford lol.

Rebels went with 2 small-hunting Liberties for their large upgrades. A very good tactic IMO. The battlecruiser in particular was loaded to pick our puny ships to pieces (in the actual battle it would contribute absolutely nothing at all).

EMPIRE R8 (2nd pivotal)

Fleet: Where Did All The Gozanti Go?
Commander: Commodore Drok Lodt (BJØRN)
Abilities (6): Master Navigator I (flagship), Master Coordinator I (flagship), Ion Techs (fleetwide), Ordnance Expert (fleetwide)
XP: 1
Conditions: None

Assault: Most Wanted
Defense: Abandoned Mining Facility
Navigation: Infested Fields

Gladiator I (56) [FLAGSHIP] [VET]
• Skilled First Officer (1)
• Ordnance Experts (4)
• External Racks (4)
• Demolisher (10)
= 75 Points

Onager Testbed (96)
• Ordnance Experts (4)
= 100 Points

Raider I (44) [VET]
• Instigator (4)
= 48 Points

Squadrons:
• Maarek Stele (21) [VET]
• Colonel Jendon (20) [VET]
• TIE Interceptor Squadron (22)
= 52 Points

Total Points: 275/275

Fleet: Dat New ISD
Commander: Fleet Captain Lex Ander (ALEXANDER)
Abilities (6): Master Gunner I (flagship), Master Navigator I (flagship), Ion Tech (fleetwide), Ordnance Expert (fleetwide)
XP: 1
Conditions: None

Assault: Most Wanted
Defense: Contested Outpost
Navigation: Infested Fields

Imperial II (120)
• Expert Shield Tech (5)
• Gunnery Team (7)
• Linked Turbolaser Towers (7)
= 139 Points

Arquitens Light Cruiser (54) [VET]
• Expert Shield Tech (5)
• Linked Turbolaser Towers (7)
= 66 Points

Gozanti Cruisers (23)
• Comms Net (2)
= 25 Points

Squadrons:
• Howlrunner (16) [VET]
• Soontir Fel (18) [VET]
• TIE Interceptor Squadron (22)
= 45 Points

Total Points: 275/275

Fleet: Never Got To Fully Pimp My Ships
Commander: Flotilla Commander So Tham (THOMAS F)
Abilities (6): Ambush Gunner II (fleetwide), Ion Tech (fleetwide), Master Engineer II (fleetwide)
XP: 5
Conditions: None

Assault: Opening Salvo
Defense: Contested Outpost
Navigation: Infested Fields

Arquitens Command Cruiser (59) [FLAGSHIP] [VET]
• Reinforced Blast Doors (5)
• Dual Turbolaser Turrets (5)
= 69 Points

Arquitens Command Cruiser (59) [VET]
• Expert Shield Tech (5)
• Dual Turbolaser Turrets (5)
= 69 Points

Raider II (48) [VET]
• Iden Versio (6)
• Disposable Capacitors (3)
• Heavy Ion Emplacements (9)
= 66 Points

Squadrons:
• Ciena Ree (17) [VET]
• Valen Rudor (13) [VET]
• Tempest Squadron (13)
• TIE Interceptor Squadron (11)
= 54 Points

Total Points: 258/275

REBELS

Eirik (261/261)
Commander
- Master Gunner III
- Ion Tech
- Master Navigator I
[flagship] MC80 Liberty Battle Cruiser (103)
- Intel Officer (7)
- Linked Turbolaser Towers (7)
- XI7 Turbolasers (6)
- Sensor Team (5)
= 128 total points
CR90 Corvette A (44) (V)
- Jaina's Light (2)
- Ezra Bridger (3)
- Turbolaser Reroute Circuits (7)
= 56 total points
GR-75 Medium Transports (18)
- Bright Hope (2)
- Comms Net (2)
- Ahsoka Tano (2)
= 24 total points
Squadrons (53/263):
1x Millennium Falcon - Lando Calrissian (23) (V)
1x Kanan Jarrus (19) (V)
1x A-Wing Squadron (11)

2nd Expeditinary Fleet (274/200)
Rebels - Author: CTS
- Squadron leader
- ion tech
- squadron group leader II
Assault Frigate Mark II B (72)(V)(Flagship)
- Reinforced Blast Doors (5)
- Adar Tallon (10)
= 87 total points
GR-75 Medium Transports (18)
- Wedge Antilles (4)
= 22 total points
GR-75 Medium Transports (18)
- Bomber Command Center (😎
- Ray Antilles (7)
= 33 total points
Squadrons (132/200):
1x Norra Wexley Y-wing Squadron (17)(V)
(S) 2x Y-Wing Squadron (20)
1x Y-Wing Squadron (10)
3x X-Wing Squadron (39)
1x Moldy Crow - Jan Ors (19)
1x Scurgg H-6 Bomber (16)
1x A-Wing Squadron (11)

Name: Roosh flying circus
Faction: Rebel
Commander:
- Master Engineer I
- Ion Tech
- Ambush Gunner II
- Infiltration I
CR90 Corvette A (44) (V)(Flagship)
• Hondo Ohnaka (2)
• Turbolaser Reroute Circuits (7)
= 53 Points
CR90 Corvette B (39)
• General Draven (3)
• Reactive Gunnery (4)
• SW-7 Ion Batteries (5)
= 51 Points
MC80 Star Cruiser (96)
• Expert Shield Tech (5)
• Auxiliary Shields Team (3)
• Spinal Armament (9)
= 113 Points
Squadrons:
• Corran Horn (22) (V)
• Hera Syndulla (28)
• A-wing Squadron (11)
• Rogue Squadron (14) (V)
• E-wing Squadron (15)
= 90 Points
Total Points: 307 (inkl Ally token for command ship upgrades)


NOTE: The MC80H1 model is a LIBERTY. The AF1 is an AF2.

I don't have a ton of pics for this one. But this image from the start of round 3, before ships start popping says it all. Rebels set up in two separate groups, thinking they could lure the ISD out of the fight and also take down our dual Arq/raider fleet quickly and then sweep into our flank.

We were very happy to see the rebel bomber ball in the corner! The ISD/ARQ/Goz combo, along with most of our squads should be able to deal with them decisively, if supported by my Instigator. It was also pretty obvious the rebels had (again) spread out too much and would be tail-chasing much of the game.

Overall we had the better deployment and the better plan. During the game, we did some things right and some things not right at all. 

Some key points:

1. Our 2 Arqs + Iden-Raider jumped from speed 1 to 3 first round, leaving a big portion of the Rebel fleet out of the fight for the entire game...

2. The Onager used a dust field and its speed to FLANK the Liberties 💪 and do quite a bit of damage before going down. Pleased with that one.

3. Insitgator jumped in at the right moment and did Instigator-things. Some spot-on squad play sealed the rebel bombers' fate. Also real pleased with that one.

4. Demolisher changed its mind. Instead of going right to make sure the potato died, it ended up boxed in by the Onager, forced to stay slow, and eventually getting killed by rogue squads, a TRC90, and the BC in turn 6. I think we need to go back to 2015 to find Demolisher play THAT bad 😅😅😅

5. Wedge officer + Demo being stupid let the AF circle around and live (with 2 hull, no shields, and no defense tokens). Should have put the ISD further to the right, but the obstacle you see in the pic kind of precluded that.

In the end, we lost a bunch of squads, Demo, and the Onager, plus the brave Arq in the right corner. Rebels lost 2 CR90s, the Star Cruiser, and a ton of squads. In all, we won by less than 20 points. But a win is a win. Got us 1 more CP, for a 12-10 total.

And that's it. RitR was fun some of the time, tedious at other times. The strategic rules have a lot of interesting ideas but the overall finish isn't polished. Overall, RitR left me with a bad taste in my mouth and I hope I'll never have to play an unmodified version EVER AGAIN. CC isn't nearly as deep but RitR is so deeply flawed I need a separate blog post to talk about it all...

Friday, July 2, 2021

Rebellion in the Rim pt. 8 (Round 7/3rd battle Act 2)


I've finally caught up with our current status: we're in the middle of the 3rd battle of act 2. Two battles have been played. The third looks like it has big trouble actually scheduling AND playing. Incompatible schedules and whatnot have played a major part in dragging out this campaign for far too long. I had hoped the smaller battles would speed things but, but actually, RitR has had slower progress than CC.

The score for this act was 3-3 before this round, 9-7 total. We've won 2 1-point battles this round, so it's 5-3 and 11-7 total. But Rebels have an assault on Mandalore so could score 3 points if they win while we only get 1 if we win. Whatever the result is it'll lead to the 2nd pivotal.

After my last win, I upgraded with ExRacks on both combat ships. So now my fleet is pretty much where I want it to be. The combination of 4 activations, Demo, ExRacks, lots of rerolls and Maarek-Jendon is not a combo that the rebel small-mediums can reliably handle. With Instigator, Fighter Group Leader, 4 Ints, and RHBs I can win any squad fight. So if I want to just win (and there is not much incentive for doing much more in RitR) I pick off a CR90 or something and sweep squads.

In other news, Alexander finally got a win which we coupled to a squadron base reward, so now he has 3 Ints and 1 TIE to go with Howl and Fel.

Assault 1: AF/CR/GR fleet attacks Endor. VSD defends with Destiny. Empire win, helped by some hot-hot-hot AS dice on the Empire's part.

Assault 2: Demolisher attacks Nar Shadda. I guess we need a Repair Yard (that's not also an ally generator) for the final battle so Nar Shadda it is. Defended by rebel mixed fleet. Empire win.

Assault 3: Rebel squad-mania attacks Mandalore base with their ally token. Out dual Arqs 'n Raider defends with the ally token. Squadron defense objective. Not played yet.

We forgot to bing mats so we played on a white, slippery table 😅 Setup was different this time: Demo on the outside, Goz, and Raider on the inside. Keeping squads close until I'm ready bc of his rogues.

Early game

The CR90B in the top-right part of the image hasn't moved yet. I now suddenly realize that it will face a last-first of Demo + Maarek/Jendon. Last-first isn't needed. Thanks to Maarek stripping 4 shields and ExRacks it pops to the last.

After this, I could have been more aggressive, killed another CR, possibly the Neb even. But there was no point risking anything. The win was mine, and the rebel player would repair everything (or nearly anything) no matter how much I killed, so pointless. 


End

From the other side of the table. I've lost a few ints...and a Gozanti (top right) is headed for oblivion. I was tricked by the lack of a mat and it sailed off the table in round 5 or so. And I worked really hard to save that Goz by activating it first during a previous round. We laughed hard 😂😂😂


Thursday, July 1, 2021

Rebellion in the Rim pt. 7 (Round 6/2nd battle Act 2)


Bases and presences start r6

This round took place a while ago but I haven't posted about it bc reasons. Bases were built and presence stickers placed but tbh team Empire didn't put a lot of thought into the process.

I forgot to mention in my previous post that the fleet cap was to 275 points for Act 2 (and 300 for act 3). Obviously a house rule. Why? Bc RitR is an incredibly dull and unbalanced campaign system, where you immediately max out your fleet with squads (and if you don't, you'll lag behind) and have also maxed out commander abilities before the first pivotal. We already increased the abilities to 6 tiers but that was only a slight speed bump.

Anyone who tries to tell me that RitR is better balanced than CC will get hit by the nerf-bat. CC doesn't always make a whole lot of sense but RitR is just as bad or worse in its own way. Playtesting must have been minimal at best and whoever designed this must have little experience with strategy games, to begin with.

I got Demo before the pivotal and have enjoyed that title. Now I have 3x Reserve Hangar decks to give my 4 Ints a second lease on life. I've been forced to take Fighter Group Leader to compete with the Rebel MAXIMUM squads list. That wasn't the plan at all but I refuse to be steamrolled by squads. My 2 companions are lagging behind on squads bc they have both lost games and chosen non-squad rewards.

Assault 1: Rebel mixed fleet attacked Smugger's Run and was opposed by the VSD fleet (destiny tokens are great for VSDs btw). Empire managed a win.

Assault 2: Our duo-Arq attacked Atollon with an ally token, defended by the potato+trc90+gr75 fleet. The idea is to give my teammates the opportunity to both attack and defend and try out playing with allies. No hugging that stuff bc I'm the more experienced player. Minor win Rebels.

Assault 3: Rebel squad spam, with ally, vs me. Rebel played used token for CR90A. With Ion Techs that's not a bad choice as it gave him activation parity. This turned out to be super-valuable and I must say probably a lot smarter than just having even moah squads that he'd probably not be able to command well.

Setup

Setup was conventional. I intended to screen with my raider/goz/squads and pounce with Demo as the opportunity presented itself. With nav I it can jump from 1 to 3 speed with a token. And as a veteran it can conjure tokens at will.

We played Precision Strike. Location objective. Hard vs Rebel bomber heavy but Maarek-Jendon in PS can be mean too.

Round 2

But look, the rebel player has a plan. AF going all-in at speed 2. Where are my squads? They are on the right flank not appreciating the danger to the flagship. Demo gets a good attack run on the AF.

Round 3

Where did Demo go? Oops, it died 1st activation turn 3. Too many bombers, a lucky crit, but mostly overconfidence/lack of a plan on my part.

In the end I managed to claw my way back out of the hole. Instigator was in a good position and started popping squads. Even w/o the flagship my Ints added to the carnage. I got to use all 3 RHD and all 4 Ints eventually died. But by the end ALL rebel squads were dead save Norra, the AF2 was no more (Maarek/Jendon + the crit where you can't redirect if shields are down in that zone) and the BCC flotilla went down as well. 6-5 to me in tokens and a decent-sized win.

Tbh the rebel deserved to win this one. He had the ally token, I did not. he had a plan, I did not. But I'm a savvy squad player and refused to give up despite the loss of the flagship.

End of this round we're at 3-3 in points for this act. So 1 more round, then a pivotal.

Tuesday, June 29, 2021

Rebellion in the Rim pt. 6 (Round 5/1st battle Act 2)


It's been a while since last I updated our RitR campaign. Progress has been sooo slow I've lost a bit of interest. Here is a brief summary of Round 5 (1st battle Act 2). 

Tuesday, April 27, 2021

Rebellion in the Rim pt. 5 (Round 4/1st Pivotal)

My name is Hermoine

Due to Covid restrictions (among other things) the was a huge delay between this pivotal and our previous game. Not ideal but we make do!

We met early on a Saturday a couple of weeks ago (that puppy and my new job is the reason I haven't been able to post this before) for our first pivotal: Demonstration of Force, Rebels assaulting. I think it took about 6 hours all told, with the squad game slowing things down by a lot from r3 and out.

The Fleets

Fleets haven't changed that much but Rebels now have Adar to make the squad madness even worse 😅 and both non-squad fleets have Ion Techs (ouch).

Our duo-Arq fleet has EST on both ships and Iden on the Raider. This is VERY useful. It still suffers from a lack of dice mods so Ion Techs (totally OP) is next on the list). The VSD fleet has dice mods but not yet any EST. And both those fleets REALLY need more squad protection. Even 1 more Int would make it better. Preferably some RHD too (that goes from me as well). My only fleet picked up Demo last turn. Demo + Maarekdon...that's a lot of ship-killing ability.

EMPIRE


STRATEGIC TOKENS
Ally: 2
Destiny: 1
Resources: 4
Skilled Spacers: 1

###

Fleet: Why So Many Gozanti?
Commander: Commodore Drok Lodt (BJØRN)
Abilities: Master Navigator I (flagship), Ordnance Expert (fleetwide)
XP: 2
Conditions: None

Assault: Most Wanted
Defense: Abandoned Mining Facility
Navigation: Infested Fields

Gladiator I (56) [FLAGSHIP] [VET]
• Ordnance Experts (4)
• Demolisher (10)
= 70 Points
Raider I (44)
• Ordnance Experts (4)
= 48 Points
Gozanti Cruisers (23)
= 23 Points
Gozanti Cruisers (23)
= 23 Points
Squadrons:
• Maarek Stele (21)
• Colonel Jendon (20) [VET]
• 4 x TIE Interceptor Squadron (44)
= 85 Points
Total Points: 249

###

Fleet: Dat Ole VSD
Commander: Fleet Captain Lex Ander (ALEXANDER)
Abilities: Master Navigator I (flagship), Ion Tech (fleetwide)
XP: 2
Conditions: Low Fuel

Assault: Most Wanted
Defense: Contested Outpost
Navigation: Infested Fields

Victory I (73) [FLAGSHIP] [VET]
• Veteran Captain (3)
• Linked Turbolaser Towers (7)
• Harrow (3)
= 86 Points
Arquitens Light Cruiser (54)
• Skilled First Officer (1)
• Linked Turbolaser Towers (7)
= 62 Points
Gozanti Cruisers (23)
• Comms Net (2)
• Suppressor (4)
= 29 Points
Squadrons:
• Soontir Fel (18) [VET]
• Howlrunner (16)
• TIE Interceptor Squadron (11)
= 45 Points
Total Points: 222

###

Fleet: Pimp My Ships
Commander: Flotilla Commander So Tham (THOMAS F)
Abilities: Master Engineer II (fleetwide)
XP: 2
Conditions: None

Assault: Opening Salvo
Defense: Contested Outpost
Navigation: Infested Fields

Arquitens Command Cruiser (59) [FLAGSHIP]
• Expert Shield Tech (5)
= 64 Points
Arquitens Command Cruiser (59)
• Expert Shield Tech (5)
= 64 Points
Raider II (48) [VET]
• Iden Versio (6)
• Disposable Capacitors (3)
= 57 Points
Squadrons:
• Ciena Ree (17) [VET]
• Valen Rudor (13) [VET]
• TIE Interceptor Squadron (11)
= 41 Points
Total Points: 226

REBELS

Tokens: 2x resource, spynet, ally, 2x skilled spacers, Repair yard.

Eirik (235)
Commander abilities
- Master Gunner I
- Ion Technician
XP: 2

Objectives: Asteroid Tactics, Surprise Attack, Minefields
.
(V) [flagship] Assault Frigate Mark II B (72)
- Skilled First Officer (1)
= 73 total points
(V) CR90 Corvette A (44)
- Jaina's Light (2)
- Intel Officer (7)
- Turbolaser Reroute Circuits (7)
= 60 total points
GR-75 Medium Transports (18)
- Bright Hope (2)
- Comms Net (2)
= 22 total points
Squadrons (80/200):
1x Millennium Falcon - Lando Calrissian (23)
1x Kanan Jarrus (19)
1x HWK-290 (12)
1x VCX-100 Freighter (15)
1x A-Wing Squadron (11)
.
.
Roosh flying circus. 214
Comnander master eng I, Ion technician, Infiltration I
Xp 1

Objectives: Surprise Attack, Abandoned Mining Facility, Solar Corona
.
(V) Nebulon-B Support Refit (51)
- General Draven (3)
- Auxiliary Shields Team (3)
- Spinal Armament (9)
= 66 total points
CR90 Corvette A (44)
- Turbolaser Reroute Circuits (7)
- Hondo Ohnaka (2)
= 53 total points
CR90 Corvette B (39)
- SW-7 Ion Batteries (5)
- Reactive Gunnery (4)
= 48 total points
Squadrons (47/200):
(V) Corran Horn E-wing Squadron (22)
1x Rogue Squadron X-wing Squadron (14)
1x A-Wing Squadron (11)
.
.
2nd Expeditinary Fleet (249/200)
Rebels - Author: CTS
Commander Tomakak
Master coordinator II
Xp: 3

Objectives: Capture the VIP, Precision Strike, Infested Fields
.
Assault Frigate Mark II B (72) (V)
- Adar Tallon (10)
= 82 total points
GR-75 Medium Transports (18)
- Bomber Command Center (😎
= 26 total points
GR-75 Medium Transports (18)
- Comms Net (2)
= 20 total points
Squadrons (121/200):
1x Norra Wexley Y-wing Squadron (17) (V)
1x Y-Wing Squadron (10)
2x Y-Wing Squadron (20) (scarred)
3x X-Wing Squadron (39)
1x Moldy Crow - Jan Ors (19)
1x Scurgg H-6 Bomber (16)

Demonstration of Force

Both sides spent 1 ally token. We took our staple 3xYV-666 and Rebels took 3xYT-1300. The 1300s were taken, I think, with Jan Ors in mind. Plus the 2400s die fast to YVs. But they never got anywhere near Jan so it didn't really help much.

We (Empire) didn't have much of a plan going into this pivotal. The only bit that we were going to focus on was not spreading out too much. 

I put my stuff down to one side, but not all the way to the edge. My squadrons, including 3xYV-666 went on the inside so they could move centrally if needed to support the rest of the Empire battle group. Both Gozanti at speed 2 aimed at squadron commands. Raider to support squads with flak. Demo (with Nav I) lurking at speed 1 ready to jump forward. And this time I'd keep Jendon-Maarek in reserve.

The VSD fleet was placed in the middle with the Arq on the left flank. Squads to the left with the Gozanti ready to command them. We still need more squads in that ball. Howl + Int + Soontir is just a minor speed bump - at best.

Our dual-Arq+Raider-II fleet on the far left. But by "far" left I mean just a little bit to the left not all the way left. Deployed to either go wide to the (far) left to lure away some rebel ship or to curl inwards and present a total of 3 Arq broadside to the approaching enemy.

Rebels put their main squad fleet in the middle facing the VSD. Their "mixed" fleet with Neb+2xCR90 facing our duo-Arq, but deployed much further out (even after using Infiltrator + Spynet token). Facing my Demo-group was 1 AF, 1 TRC90 (JL), and BH backed by a squad ball augmented by the 1300s.


Rebels moving their first ship of the day.

My battle group augmented by YVs.

Our center-left. Arqs are angled slightly to the left but being Arqs they can quickly curl right and present their combined broadsides.

Closeup of rebel left flank facing my Demo. For some reason, Bright Hope is heading away and both rebel combat ships are clumped together.

View of rebel center and right flank. They are spread out too much. The same thing happened in CC.

Closeup of rebel chief of staff's hands. A most cunning and sinister plot is afoot!

Early r1. Ships are edging forward.

Left flank perspective. Clearly shows how the rebels are way too spread out.

Forgot to take pics for a little while...Demo & Maarekdon murderer poor Jaina's Light. The tiny corvette should have taken cover behind the AF or gone wide. Instead it was an easy target that popped too soon.

The rebel right flank was doing fine and close to killing the Arq flagship. Then THIS WILD ROLL HAPPENED. 8 dmg on 4 reds...rerolling with Evade...another double. The chance of that happening is...very small. Dead CR90 --> Arq flagship that managed to limp into hyperspace.

This is after the TRC90 died. That potato is heading into red dice hell. Rebel squads waste time killing some Howl/Soontir/Int and make only a half-hearted bombing run on the VSD.

Overview. I think this is start r4. Rebels activate something...

...Maarek setting up Demo.

Poor Ints. We need RHD bad.

Die rebel scum!

Potato gone. Neb in trouble. If not for the 8-damage roll that flank would have developed very differently.

Demo pounces. The AF2 (AF1 model) is nearly dead at this stage. The VSD fleets Arq actually kills two potatoes in this game, both on 1 hull. Talk about being served by your allies 😅

End state. Rebels are hunted down to (almost) the last man. The CR90B makes it out alive. As do Rogue squad and Mr. Jarrus. Both achieve veteran status by running for the hills. Every other rebel squad is destroyed.

The Empire loses 2 flotillas and a handful of squads. Massive 410 MoV victory for us, earning us a ton of extra XP. Go Empire!

In many ways, the Rebels lost at setup. They did exactly the same things as when we played the final assault in CC: spread out too much. We delayed engagement in the center/our left while I used my striking power to hammer the rebel flank. Only after 1/3 of the rebel fleet was out of action did the main battle begin. Rebels squads were too slow to engage and not focused enough (hard when both potatoes die and no other combat ships nearby). The final flank was pretty much decided by a single dice roll. Instead of a tough fight, the rebels lost their TRC90 to bad luck and the Arq limped away into hyper on 1 hull and no shields. But even barring that dice roll Empire would have won by a good margin. But not 410 MoV good.

Next up is act 2!

Monday, March 22, 2021

Rebellion in the Rim pt. 4 (Round 3)

Let's look at the 3rd campaign turn:

The Fleets

Nothing much has changed. We still have trouble handling the squad-heavy Rebel list and think it's a bit silly but we're not complaining. Much. I've temporarily maxed out my fleet on squads but I've planned to tone it down a bit. Or at least I want to. Not sure I can, given the number of squads in a certain rebel list...

My allies have their defensive aces and now 1 TIE Int each 😅 The Arq+Arq+Raider fleet won a green objective last turn and now comes with Iden and 1 EST. The Arq+VSD+Goz fleet could only afford Vet Captain and SFO.

Wednesday, March 10, 2021

Rebellion in the Rim pt. 3 (Round 2)

Round 2 map

Things are getting interesting. Let's dive into turn 2 of RitR!

The Fleets

We needed more squadrons, so we got more squadrons. I won, so 2 Ints and 1 TIE for me. My fellows could afford no more than 1 Int each. Ouch. Double ouch when you see the potato + squads list taking another X-wing and a Scurrg. It's a legit fleet. The best of all 3 rebel task forces. But it's already at 111 pts of squads. None of my fellow commanders can handle that. So what do we do? We send my fleet and use the ally token and hope for the best. The rest of the rebels also got more squads but they aren't as extreme.

Tuesday, February 23, 2021

Rebellion in the Rim pt. 2 (Round 1)


BASES

When picking bases my team (Empire) decided we wanted a Squadron location. Montross became a natural first selection. For our 2 final picks, we wanted A) maximum base coverage in terms of sectors and B) Resource tokens (for base building).

Rebels then went for Mon Cala first. 

We picked Mygeeto. It's kind of a shitty place but it has a Resource and it's in the same sector as Mandalore. Also, if the Rebels had any Peltas, we could block access to Fleet Commands. That could be relevant in 400-point games but maybe not as much at 200.

Rebels went Sullust.

We got Mustafar. Mostly because it's in sector V and has a Resource, but also bc the double Arq fleet needs access to turbolaser upgrades. I suppose controlling access to Fleet Support is an added benefit but I don't think it'll matter this time around.

We noted down our base defenses but I'm not going to list them here. Bothan spies you know 😏

Round 1 map

ASSAULTS

Rebels sent their AF+squads list against Concord Dawn. We defended with VSD+Arq. This did, somewhat predictably, end with a Rebel win. VSD went down and Arq + Gozanti fled. Not a lot of damage on the Rebel side. It's a bit unfortunate that Rebels choose a skew list. Winning at Concord just made it worse. None of my fellow commanders have any hope of handling it, so we'll just try and match me against it every round. Sigh.

I sent my fleet against Mandalore. Opposed by Neb + TRC90 + CR90B. We played his Abandoned Mining Facility. I parked behind the dust field and milked it, forcing him to come to me. Being 1st player and out activating him, I was also to destroy most of his fleet losing only the Raider and Jendon. 12 to 5 in tokens for me.

The final assault was Potato + TRC90 (always tons of TRC90s) against Nal Hutta (predictably). We defended with dual Arqs + Raider-II. Those Arqs lack dice fixing which proved their undoing. A minor win for rebels. But that's all it takes.