 |
My name is Hermoine
|
Due to Covid restrictions (among other things) the was a huge delay between this pivotal and our previous game. Not ideal but we make do!
We met early on a Saturday a couple of weeks ago (that puppy and my new job is the reason I haven't been able to post this before) for our first pivotal: Demonstration of Force, Rebels assaulting. I think it took about 6 hours all told, with the squad game slowing things down by a lot from r3 and out.
The Fleets
Fleets haven't changed that much but Rebels now have Adar to make the squad madness even worse 😅 and both non-squad fleets have Ion Techs (ouch).
Our duo-Arq fleet has EST on both ships and Iden on the Raider. This is VERY useful. It still suffers from a lack of dice mods so Ion Techs (totally OP) is next on the list). The VSD fleet has dice mods but not yet any EST. And both those fleets REALLY need more squad protection. Even 1 more Int would make it better. Preferably some RHD too (that goes from me as well). My only fleet picked up Demo last turn. Demo + Maarekdon...that's a lot of ship-killing ability.
EMPIRE
STRATEGIC TOKENS
Ally: 2
Destiny: 1
Resources: 4
Skilled Spacers: 1
###
Fleet: Why So Many Gozanti?
Commander: Commodore Drok Lodt (BJØRN)
Abilities: Master Navigator I (flagship), Ordnance Expert (fleetwide)
XP: 2
Conditions: None
Assault: Most Wanted
Defense: Abandoned Mining Facility
Navigation: Infested Fields
Gladiator I (56) [FLAGSHIP] [VET]
• Ordnance Experts (4)
• Demolisher (10)
= 70 Points
Raider I (44)
• Ordnance Experts (4)
= 48 Points
Gozanti Cruisers (23)
= 23 Points
Gozanti Cruisers (23)
= 23 Points
Squadrons:
• Maarek Stele (21)
• Colonel Jendon (20) [VET]
• 4 x TIE Interceptor Squadron (44)
= 85 Points
Total Points: 249
###
Fleet: Dat Ole VSD
Commander: Fleet Captain Lex Ander (ALEXANDER)
Abilities: Master Navigator I (flagship), Ion Tech (fleetwide)
XP: 2
Conditions: Low Fuel
Assault: Most Wanted
Defense: Contested Outpost
Navigation: Infested Fields
Victory I (73) [FLAGSHIP] [VET]
• Veteran Captain (3)
• Linked Turbolaser Towers (7)
• Harrow (3)
= 86 Points
Arquitens Light Cruiser (54)
• Skilled First Officer (1)
• Linked Turbolaser Towers (7)
= 62 Points
Gozanti Cruisers (23)
• Comms Net (2)
• Suppressor (4)
= 29 Points
Squadrons:
• Soontir Fel (18) [VET]
• Howlrunner (16)
• TIE Interceptor Squadron (11)
= 45 Points
Total Points: 222
###
Fleet: Pimp My Ships
Commander: Flotilla Commander So Tham (THOMAS F)
Abilities: Master Engineer II (fleetwide)
XP: 2
Conditions: None
Assault: Opening Salvo
Defense: Contested Outpost
Navigation: Infested Fields
Arquitens Command Cruiser (59) [FLAGSHIP]
• Expert Shield Tech (5)
= 64 Points
Arquitens Command Cruiser (59)
• Expert Shield Tech (5)
= 64 Points
Raider II (48) [VET]
• Iden Versio (6)
• Disposable Capacitors (3)
= 57 Points
Squadrons:
• Ciena Ree (17) [VET]
• Valen Rudor (13) [VET]
• TIE Interceptor Squadron (11)
= 41 Points
Total Points: 226
REBELS
Tokens: 2x resource, spynet, ally, 2x skilled spacers, Repair yard.
Eirik (235)
Commander abilities
- Master Gunner I
- Ion Technician
XP: 2
Objectives: Asteroid Tactics, Surprise Attack, Minefields
.
(V) [flagship] Assault Frigate Mark II B (72)
- Skilled First Officer (1)
= 73 total points
(V) CR90 Corvette A (44)
- Jaina's Light (2)
- Intel Officer (7)
- Turbolaser Reroute Circuits (7)
= 60 total points
GR-75 Medium Transports (18)
- Bright Hope (2)
- Comms Net (2)
= 22 total points
Squadrons (80/200):
1x Millennium Falcon - Lando Calrissian (23)
1x Kanan Jarrus (19)
1x HWK-290 (12)
1x VCX-100 Freighter (15)
1x A-Wing Squadron (11)
.
.
Roosh flying circus. 214
Comnander master eng I, Ion technician, Infiltration I
Xp 1
Objectives: Surprise Attack, Abandoned Mining Facility, Solar Corona
.
(V) Nebulon-B Support Refit (51)
- General Draven (3)
- Auxiliary Shields Team (3)
- Spinal Armament (9)
= 66 total points
CR90 Corvette A (44)
- Turbolaser Reroute Circuits (7)
- Hondo Ohnaka (2)
= 53 total points
CR90 Corvette B (39)
- SW-7 Ion Batteries (5)
- Reactive Gunnery (4)
= 48 total points
Squadrons (47/200):
(V) Corran Horn E-wing Squadron (22)
1x Rogue Squadron X-wing Squadron (14)
1x A-Wing Squadron (11)
.
.
2nd Expeditinary Fleet (249/200)
Rebels - Author: CTS
Commander Tomakak
Master coordinator II
Xp: 3
Objectives: Capture the VIP, Precision Strike, Infested Fields
.
Assault Frigate Mark II B (72) (V)
- Adar Tallon (10)
= 82 total points
GR-75 Medium Transports (18)
- Bomber Command Center (😎
= 26 total points
GR-75 Medium Transports (18)
- Comms Net (2)
= 20 total points
Squadrons (121/200):
1x Norra Wexley Y-wing Squadron (17) (V)
1x Y-Wing Squadron (10)
2x Y-Wing Squadron (20) (scarred)
3x X-Wing Squadron (39)
1x Moldy Crow - Jan Ors (19)
1x Scurgg H-6 Bomber (16)
Demonstration of Force
Both sides spent 1 ally token. We took our staple 3xYV-666 and Rebels took 3xYT-1300. The 1300s were taken, I think, with Jan Ors in mind. Plus the 2400s die fast to YVs. But they never got anywhere near Jan so it didn't really help much.
We (Empire) didn't have much of a plan going into this pivotal. The only bit that we were going to focus on was not spreading out too much.
I put my stuff down to one side, but not all the way to the edge. My squadrons, including 3xYV-666 went on the inside so they could move centrally if needed to support the rest of the Empire battle group. Both Gozanti at speed 2 aimed at squadron commands. Raider to support squads with flak. Demo (with Nav I) lurking at speed 1 ready to jump forward. And this time I'd keep Jendon-Maarek in reserve.
The VSD fleet was placed in the middle with the Arq on the left flank. Squads to the left with the Gozanti ready to command them. We still need more squads in that ball. Howl + Int + Soontir is just a minor speed bump - at best.
Our dual-Arq+Raider-II fleet on the far left. But by "far" left I mean just a little bit to the left not all the way left. Deployed to either go wide to the (far) left to lure away some rebel ship or to curl inwards and present a total of 3 Arq broadside to the approaching enemy.
Rebels put their main squad fleet in the middle facing the VSD. Their "mixed" fleet with Neb+2xCR90 facing our duo-Arq, but deployed much further out (even after using Infiltrator + Spynet token). Facing my Demo-group was 1 AF, 1 TRC90 (JL), and BH backed by a squad ball augmented by the 1300s.
Rebels moving their first ship of the day.
My battle group augmented by YVs.
Our center-left. Arqs are angled slightly to the left but being Arqs they can quickly curl right and present their combined broadsides.
 |
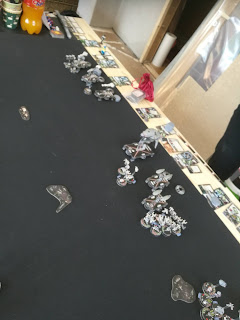
| Closeup of rebel left flank facing my Demo. For some reason, Bright Hope is heading away and both rebel combat ships are clumped together. |
 |
| View of rebel center and right flank. They are spread out too much. The same thing happened in CC. |
 |
| Closeup of rebel chief of staff's hands. A most cunning and sinister plot is afoot! |
 |
| Early r1. Ships are edging forward. |
Left flank perspective. Clearly shows how the rebels are way too spread out.
Forgot to take pics for a little while...Demo & Maarekdon murderer poor Jaina's Light. The tiny corvette should have taken cover behind the AF or gone wide. Instead it was an easy target that popped too soon.
The rebel right flank was doing fine and close to killing the Arq flagship. Then THIS WILD ROLL HAPPENED. 8 dmg on 4 reds...rerolling with Evade...another double. The chance of that happening is...very small. Dead CR90 --> Arq flagship that managed to limp into hyperspace.
This is after the TRC90 died. That potato is heading into red dice hell. Rebel squads waste time killing some Howl/Soontir/Int and make only a half-hearted bombing run on the VSD.
Overview. I think this is start r4. Rebels activate something...
...Maarek setting up Demo.
Poor Ints. We need RHD bad.
Die rebel scum!
Potato gone. Neb in trouble. If not for the 8-damage roll that flank would have developed very differently.
Demo pounces. The AF2 (AF1 model) is nearly dead at this stage. The VSD fleets Arq actually kills two potatoes in this game, both on 1 hull. Talk about being served by your allies 😅
End state. Rebels are hunted down to (almost) the last man. The CR90B makes it out alive. As do Rogue squad and Mr. Jarrus. Both achieve veteran status by running for the hills. Every other rebel squad is destroyed.
The Empire loses 2 flotillas and a handful of squads. Massive 410 MoV victory for us, earning us a ton of extra XP. Go Empire!
In many ways, the Rebels lost at setup. They did exactly the same things as when we played the final assault in CC: spread out too much. We delayed engagement in the center/our left while I used my striking power to hammer the rebel flank. Only after 1/3 of the rebel fleet was out of action did the main battle begin. Rebels squads were too slow to engage and not focused enough (hard when both potatoes die and no other combat ships nearby). The final flank was pretty much decided by a single dice roll. Instead of a tough fight, the rebels lost their TRC90 to bad luck and the Arq limped away into hyper on 1 hull and no shields. But even barring that dice roll Empire would have won by a good margin. But not 410 MoV good.
Next up is act 2!


No comments:
Post a Comment