Tuesday, December 18, 2018

The Executor Arrives (on Vassal)


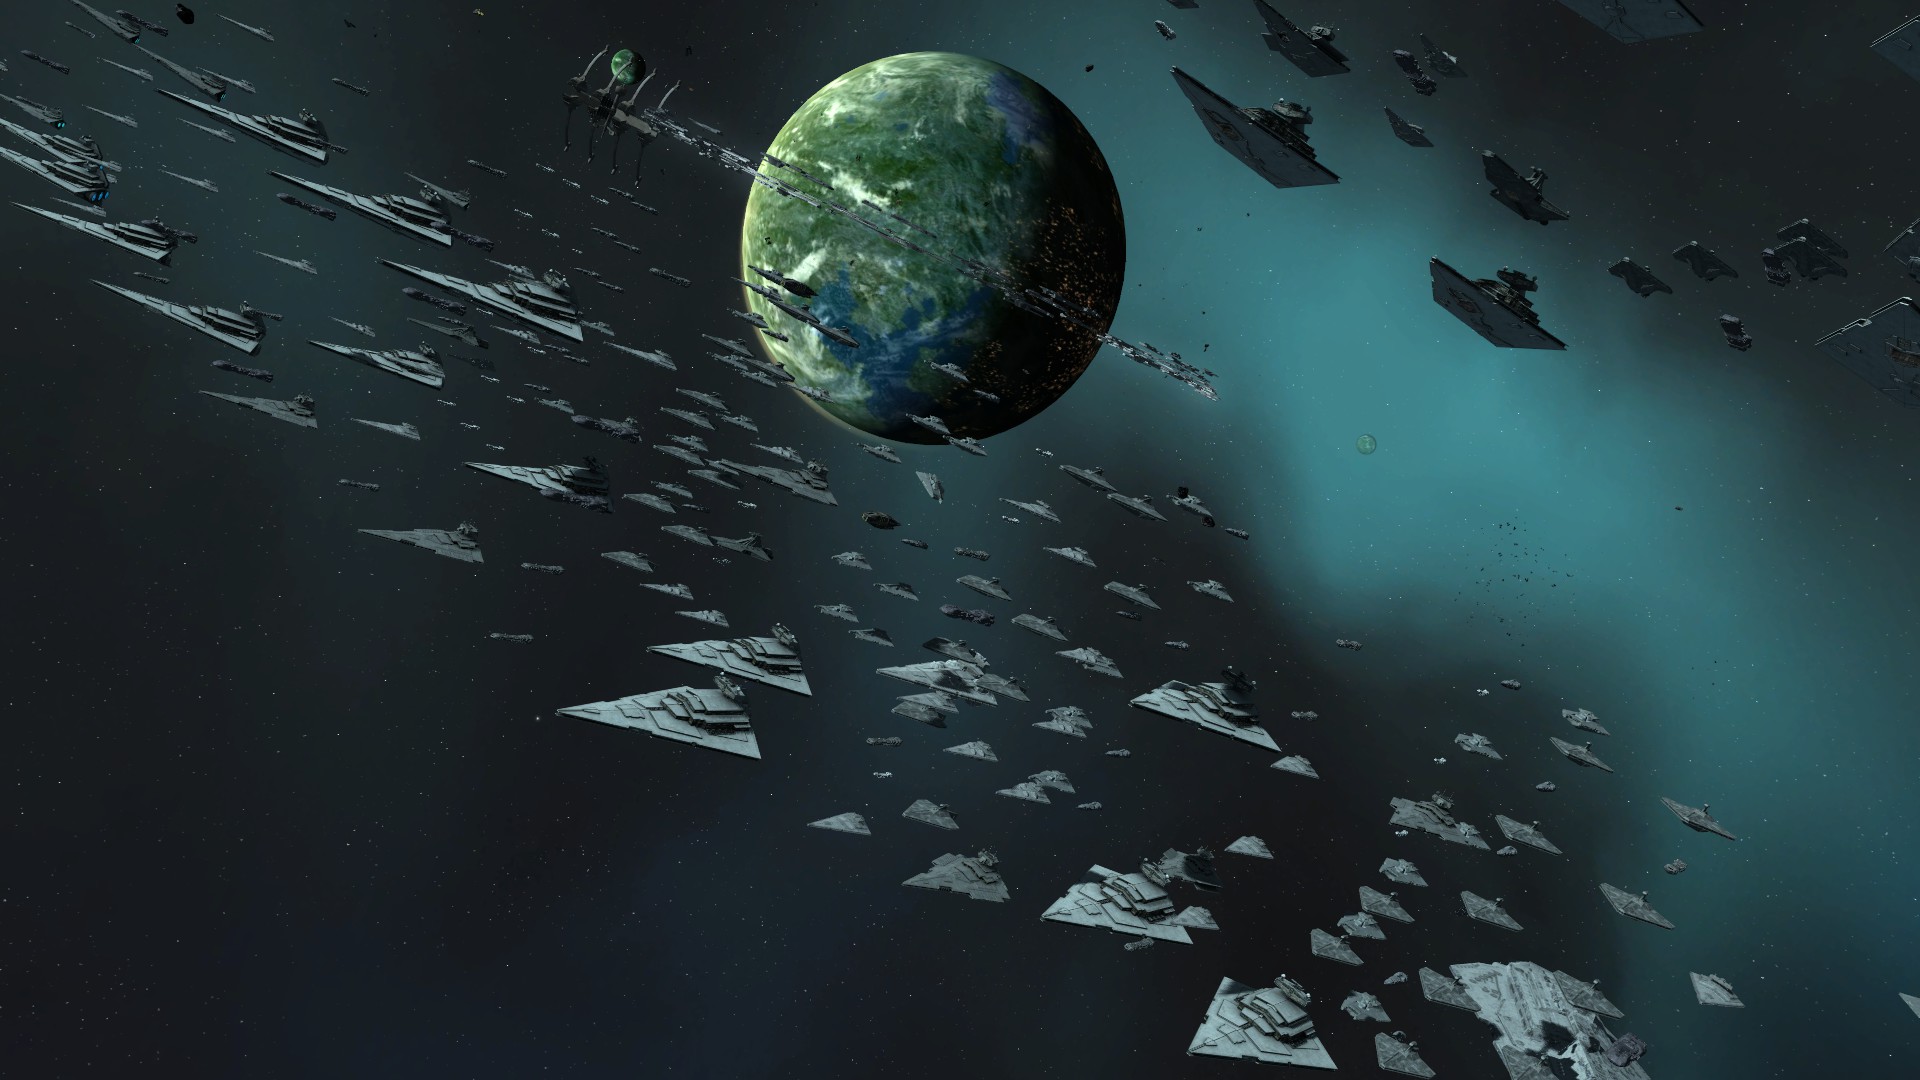
I got bored waiting for the SSD, so I played around some with the module, and here it is, fully armed and operational, THE EXECUTOR!

THE GOOD: In terms of cards, i.e. ship and upgrade cards, everything has been spoiled on Reddit (and for a while on YouTube by Crabbok). The actual arcs we have from the article, so I think we have 100% coverage in terms of key components.


THE BAD: It's a "beta" build. I just took the old build I handed over to Team JJ, then merged in all of the good functionality I could find from their branch and then didn't really test much. So I may have missed something. The build is unofficial, so expect this branch to die once the official build is out.

THE UGLY: We don't know EXACTLY what the new rules are. We have quite a few from the article - the pass rule, the three attacks, the new arcs, etc. But there may be more. I've made some educated guesses - like how to deploy (you can stick out of the zone as long as your  touches the back - same as X-wing) - but we don't KNOW 100% yet.

But don't let minor quibbles stop you: try it, have some fun!


The Executor II, with all the upgrades I could cram in! l-o-l

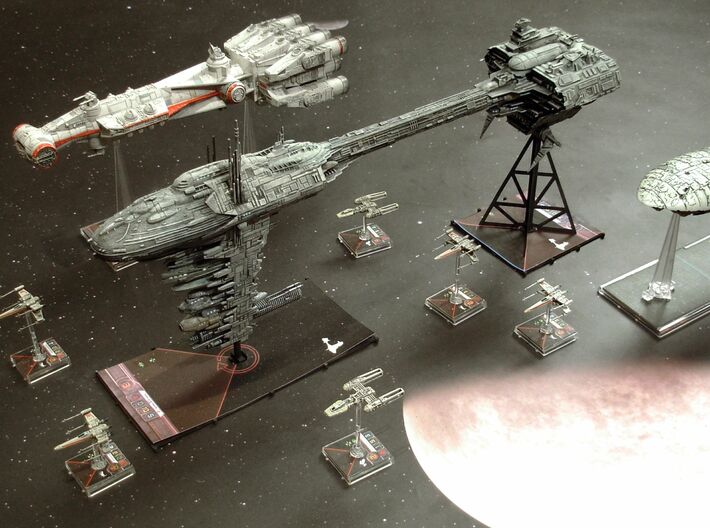
The base is equal to 2 ISDs, with an additional "space" between the bases. So it sticks out waaay beyond the normal dep zone!

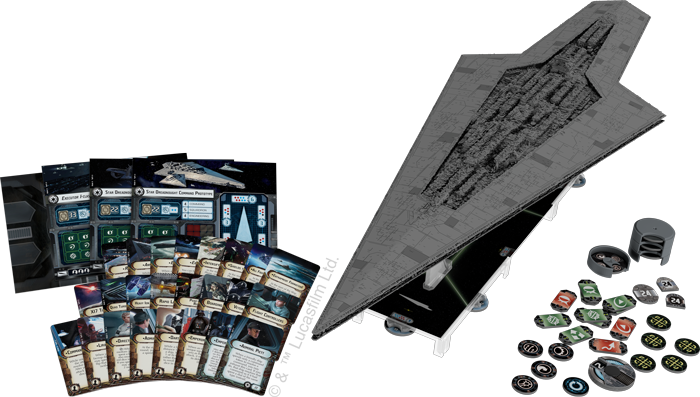
The IRL model is MUCH bigger (you can see it above) than the once I've chosen. All the ships that stick out beyond their bases get shrunk on Vassal. Function before looks!

Moving from the rear base, the SSD covers a staggeringly large area with its guns. This is just after moving in r1...exactly HOW do you flank this thing!?

Friday, November 9, 2018

Trials of Konstantine: Round 4


King K is back with his final report for VAT18!

My round 4 game was concluded yesterday. Pairings were just up, and I just chanced to meet Aresius in the Vassal lobby, so we decided to play our game.

For those of you who know Ares, he's been playing multi-activation Liberty for like ages (more specifically, since the day w3/4 dropped). He's run like a 1000 different builds, including some pretty squad-heavy ones, but now he's (almost) squad-less. He's also gone from Dodonna to Rieekan.

The basic idea is the same: use activations to stall, then BAM the last/first with the Liberty, which afterwards jumps away to safety. But now he has THREE hammerheads rather than just a ton of flotillas, so the rest of the fleet can soften up the enemy before the big strike. He's also less prone to tabling, and has better ability to table opponents, including "sweeping" damaged ships.

With fewer activations - and most likely 2nd player - I would have few advantages other than my objectives and my grav-shifted obstacles. This was going to be one tough fight!

Aresius
Commander: General Rieekan 

[ flagship ] MC80 Star Cruiser (96 points) - General Rieekan (30 points) - Mon Karren (8 points) Bail Organa (7 points) - Gunnery Team (7 points) - Engine Techs (8 points) - Spinal Armament (9 points) - X17 Turbolasers (6 points) - Leading Shots (4 points) = 175 total ship cost 

Hammerhead Scout Corvette (41 points) - Task Force Organa (1 points) - Disposable Capacitors (3 points) - Turbolaser Reroute Circuits (7 points) = 52 total ship cost 

Hammerhead Scout Corvette (41 points) - Task Force Organa (1 points) - Disposable Capacitors (3 points) - Turbolaser Reroute Circuits (7 points) = 52 total ship cost 

Hammerhead Torpedo Corvette (36 points) - Task Force Organa (1 points) - External Racks (3 points) = 40 total ship cost

GR-75 Medium Transports (18 points) - Leia Organa (3 points) - Comms Net (2 points) = 23 total ship cost

GR-75 Medium Transports (18 points) - Toryn Farr (7 points) = 25 total ship cost

1 VCX-100 Freighter ( 15 points)  = 15 total squadron cost

Unfortunately I (again) killed my logfile, so I only have pics from r5-6. However, nothing much happened r1-4. Or rather, we slowly crept towards one another, careful not to expose any weakness...

As predicted he chose 1st and picked my MW. I set up defensively to left, Ares set up very cautiously int the bottom right, going slow. This might mean a late clash, but you have to be alert: that Liberty can suddenly be right in your face at speed 4!

I rearranged the obstacles to make a little "castle" for my ships around the the sation. Not much of an advantage, but still, you take what you're offered. I chose my Comms flotilla (far left) and his Liberty as MW. I didn't really expect to get to kill the MC80, but by making it the MW ship, Ares would be forced to be extra careful with it.

So we crept towards each other. He seemed perhaps a bit too cautions, but probably wanted to maximize his activation advantage. 

This is round 5: Dictor is parked on the station (heading for the rocks), but well guarded by my ISD. Ny Suppressor/Slicer have jumped forward. It won't be slicing the Liberty, but that was never really an option (auto death sentence really). So I settle for slicing HHs to squad.

Prior to this not much happened: I attacked the VCS with my squads, hurting it and pinning it in place. My ISD intentionally rammed my Goz to stay in place. HHs took some shots at the Goz, but only took out 1 shld.


Round 5 underway. HHs taking shots at me, but not doing too much damaged bc of Brunson especially and tokens. My return fire do some decent damage, mostly thanks to DCaps. Suppressor keeps superessing and slicing. ISD sets up for a VERY nice arc for round 6, threatening all HHs and double arcing the Liberty if it dashes forward.


Start of round six. I avoid the rock with the Dcitor by making an "inside turn" to bump my ISD. This lets me back up and land on the tool. ISD take 1 hull, but will never be in any danger. Dictor land of station get immediately heal damage. This has the added benefit of keeping Dictorout of Liberty range. A rather nice move I must say!

Liberty is up close and personal, taking a rock on the way in. Two HHs are hurting BAD, and the third is headed for disaster too...but is saved by the turn limit :-D


Liberty activates top of r6, but between Brunson and Scramblers its nowhere near to killing the Dictor, who is now almost at full health due to liberal use of repair dial+token. Ares tries to jump across...and makes it. It's the closest non-overlap I've ever seen. If he hadn't made the jump, the Lib would have died, double arced by both the ISD AND the Dictor - who could also do the double ram...total overkill!

Instead the lib gets away, but angry ISD kills torp HH which turns zombie and the wounded scout near the top. Ciena kills VCX and game.


Ares lost 1 HH scout, 1 HH torp, and VCX. I lose nothing. 107-0, 7-4.

And that concludes my Konstantine run in VAT18. It's actually been kind of fun, if a little frustrating at times. In this game, and some of the others (but not vs Broba, when it really counted) I got some use of Konstantine. To truly, either of Motti or JJ would have been just as good, if not better. And oc this is the problem with Konstnatine.

Anyway, scores of 8-3, 8-3, 4-7, 7-4 gives me 27 pts and a really good rank in the Euro sector. Not enough for the cut, but I'm quite happy with my performance.

Thursday, November 8, 2018

Trials of Konstantine: Round 3


Time to finish the round 3 AAR.

Game vs Boba's Thrawn 2-ship took place right before Nordics, so I didn't have time for a writeup before, and after I wanted to finish my Nordcis AAR while they were fresh in my memory.

Anyway. Boba's 2-ship is well known to me, as it is the fleet that gave me the inspiration to my own Nordics list. And realistically there is no chance in hell that my Konstantine list can beat it.

Boba would pick 1st and my Contested Outpost. Then the likely result would be 8-3 to him - or possible worse, as he's capable of tabling me if I let him.

Name: Boba Thrawn 2-ship
Faction: Imperial
Commander: Grand Admiral Thrawn

Assault: Close-Range Intel Scan
Defense: Fighter Ambush
Navigation: Superior Positions

Imperial II (120)
• Grand Admiral Thrawn (32)
• Governor Pryce (7)
• Gunnery Team (7)
• Electronic Countermeasures (7)
• Leading Shots (4)
• Quad Battery Turrets (5)
• Avenger (5)
= 187 Points

Quasar Fire I (54)
• Captain Brunson (5)
• Flight Controllers (6)
• Boosted Comms (4)
• Squall (3)
= 72 Points

Squadrons:
• Colonel Jendon (20)
• Maarek Stele (21)
• 2 x TIE Defender Squadron (32)
• Dengar (20)
• Mauler Mithel (15)
• Captain Jonus (16)
• Black Squadron (9)
= 133 Points

Total Points: 392

Lo and behold, what went down is EXACTLY what I predicted. Only I was able to somehow only lose 7-4, which ain't a half bad result in my book.

Anyway, we set up (predictable) like this. I made a couple of "funnels" using grav shit, in a vain attempt at controlling his movement. Unfortunately Thrawn ships are REALLY agile, so I got little out of this.


My ISD sort of has to face his ISD. I have no other ship that can hope to survive, not even for a little while. My Dictor, normally so tanky vs squads, will just crumple to the Pryce last/first. So will the ISD of course, but I hope to get some good damage from it.

Meanwhile it is my hope that the Dictor can surprise Boba a bit by actively and aggressively going for the Quasar. If I can take it out, then maybe together my ISD +  Dictor can kill his ISD. I don't really expect this to happen, but it's as good a plan as any.

Start of round 2. ISD dodges the rocks and heads down the funnel. I'm still pretty happy, as I won't glide into his red range at all on round 2. Dictor moving forward. Quasar for some strange reason aiming to land on the debris. What were u thinking, Broba? It's NOT a dust field :P


Defenders kill my squads. Squall + speed 5 is amazing. Bombers start hitting my ISD in r2, but I'm still hoping. Start of r3 I'm double arced, but I'm doing relatively good all things considered. Also the Quasar landed on the debris AND I got it double arced.


And that's really all there is to say about the game. ISD activates top r3, and with consistent bombers AND really good dice, the ISD dies without ever shooting. That was unexpected and sad. However, even if I had gotten to shoot, it would only be that one shot, which would not really have changed to outcome of the game. My ISD would die round 4 anyway, and I don't have the firepower to take out his ISD.

I kill the Quasar, with a little help from Broba, who maneuvers it BAD and even has a REPAIR command lined up. Wtf!? I get to slice the ISD to Reapir a lot, so Boba's squads don't do much from round 4 and out.

At the start of round 5 I have even sliced the ISD the round before AND block the double arc with my Gozanti. It was my nicest move of the whole game :D


It ends with 7-4 to Broba. I lose 1 Goz, the ISD and both squads. He loses Quasar and Black. We got a couple of tokens each.

In this game I had zero use of Konstantine. Motti would have been IMMENSELY helpful.


Monday, November 5, 2018

Nordics 2018 - After action report part 7, ALL THE LISTS!


Here are all the lists from Nordcis.

Full credit to Mikael Vikstrøm (our TO) and Uppsala Starfighters 


So here are the lists from the event in all their glory. I’ve taken the liberty to do a hot take on each list, but first some statistics. Of the top eight lists there were five loose archetypes that could be identified.

Archetypes         Top 8 Top 4 Top 2
MSU+Anchor         1         1         1
Rieekan-a-holes 2         2
Thrawn-few-ship 2         1         1
Sloane-aces         2
Dual ISD                 1

MSU+anchor denotes any build that have six or more activations, with one of them being a large ship. Thrawn-few-ship is an archetype with Thrawn and a few activations plus a whole lot of squadrons lending quality to each activation.

There were a slight overweight of imperial fleets, and they placed a little better than their rebel counterparts. Squadless fleets have been popular lately but were in minority today. Out of twenty four fleets, seven were squadless. Notably though one of those was the winning fleet.

Nine Commanders graced us with their presence with Rieekan and Sloane being most popular. None of the most popular commander, however made it into the top two. That honor belongs to Motti, and Thrawn.

The most common number of activations (including Strategic Advisor, a very common card this day) was five activations. If you had six activations you could beat most of the field, but notably if we check the top scoring lists there is a good representation of most of the activation numbers. Activation advantage seems not to have been the most deciding factor.

Finally the number of deployments (not counting single squadrons or Raddus drops) seems to center on seven deployments with the tow top lists slightly below on five and six deployments. Top fleet on five deployments (all ships), and the second two ships and eight squadrons.

And with that presentation of statistics I now present the lists in order of placement.

Thomas Hougaard
Faction: Imperial
Commander: Admiral Motti

Assault: Most Wanted
Defense: Contested Outpost
Navigation: Solar Corona

ISD Cymoon 1 Refit (112)
• Admiral Motti (24)
• Strategic Adviser (4)
• Intensify Firepower! (6)
• Gunnery Team (7)
• Spinal Armament (9)
= 162 Points

Victory II (85)
• Chart Officer (2)
• Gunnery Team (7)
• Disposable Capacitors (3)
• Heavy Ion Emplacements (9)
= 106 Points

Gladiator I (56)
• Captain Brunson (5)
• Ordnance Experts (4)
• Assault Proton Torpedoes (5)
• Demolisher (10)
= 80 Points

Gozanti Cruisers (23)
• Comms Net (2)
= 25 Points

Gozanti Cruisers (23)
• Comms Net (2)
= 25 Points

Total Points: 398

This is not something I’d like to get in front of. The Vic might be vulnerable to be outdeployed, but Motti in the mix means most of the ships will stand up to a beating and still be around the round after.

Activations 6
Deployments 5

Bjørn Blom Sørgjerd
Faction: Imperial
Commander: Grand Admiral Thrawn

Assault: Close-Range Intel Scan
Defense: Planetary Ion Cannon
Navigation: Superior Positions

Imperial II (120)
• Grand Admiral Thrawn (32)
• Governor Pryce (7)
• Gunnery Team (7)
• Electronic Countermeasures (7)
• Leading Shots (4)
• Quad Battery Turrets (5)
• Avenger (5)
= 187 Points

Quasar Fire I (54)
• Captain Brunson (5)
• Flight Controllers (6)
• Boosted Comms (4)
• Squall (3)
= 72 Points

Squadrons:
• Maarek Stele (21)
• Colonel Jendon (20)
• TIE Defender Squadron (16)
• Dengar (20)
• Mauler Mithel (15)
• Captain Jonus (16)
• Valen Rudor (13)
• Tempest Squadron (13)
= 134 Points

Total Points: 393

Only two activations, but man do they count. Thanks to Jonus the ISD can also relatively easily take out flotillas. Vulnerable to tabling, but Bjørn will fight tooth and nail to not let that happen.

Activations 2
Deployments 6

Mats Jonsson
Faction: Rebel
Commander: General Rieekan

Assault: Advanced Gunnery
Defense: Fighter Ambush
Navigation: Superior Positions

MC80 Command Cruiser (106)
• General Rieekan (30)
• Strategic Adviser (4)
• Fighter Coordination Team (3)
• Leading Shots (4)
• Quad Battery Turrets (5)
= 152 Points

Nebulon-B Escort Frigate (57)
• Flight Commander (3)
• Yavaris (5)
= 65 Points

GR-75 Medium Transports (18)
• Toryn Farr (7)
• Bright Hope (2)
= 27 Points

GR-75 Medium Transports (18)
• Comms Net (2)
= 20 Points

Squadrons:
• Ten Numb (19)
• Jan Ors (19)
• Scurrg H-6 Bomber (16)
• Hera Syndulla (28)
• Gold Squadron (12)
• 3 x YT-1300 (39)
= 133 Points

Total Points: 397

Rieekan-aceholes variant with a big ship holding it up, and YTs instead of X-Wings for escort. A little bit light on bombers, but on the other hand it’s got that combination of objectives that you’ll hate to see at the other side of the table. Only two non flotilla ships, so vulnerable to tabling.

Activations 5
Deployments 8

Christian Ingemann Nielsen
Faction: Rebel
Commander: General Rieekan

Assault: Precision Strike
Defense: Contested Outpost
Navigation: Superior Positions

GR-75 Medium Transports (18)
• Leia Organa (3)
• Comms Net (2)
= 23 Points

GR-75 Medium Transports (18)
• Bomber Command Center (8)
• Boosted Comms (4)
• Bright Hope (2)
= 32 Points

Hammerhead Torpedo Corvette (36)
• General Rieekan (30)
= 66 Points

MC75 Armored Cruiser (104)
• Toryn Farr (7)
• Flight Controllers (6)
• Boosted Comms (4)
• Electronic Countermeasures (7)
• External Racks (3)
• Leading Shots (4)
• XI7 Turbolasers (6)
= 141 Points

Squadrons:
• Dutch Vander (16)
• Nym (21)
• Wedge Antilles (19)
• Gold Squadron (12)
• Shara Bey (17)
• Norra Wexley (17)
• HWK-290 (12)
• Luke Skywalker (20)
= 134 Points

Total Points: 396

Rieekan-aceholes without Yavaris?!? Rieekan should survive on his lifeboat while Precision Strike, and Superior Position lets him harvest tokens while Contested Outpost forces you to come to him. Vulnerable to tabeling, but I don’t think that Hammerhead will come anywhere near a threat.

Activations 4
Deployments 8

Rolf Hilleberg
Faction: Imperial
Commander: Admiral Sloane

Assault: Most Wanted
Defense: Fighter Ambush
Navigation: Superior Positions

ISD Kuat Refit (112)
• Admiral Sloane (24)
• Strategic Adviser (4)
• Boarding Troopers (3)
• Electronic Countermeasures (7)
• Leading Shots (4)
• External Racks (3)
• Avenger (5)
= 162 Points

Quasar Fire I (54)
• Flight Controllers (6)
• Boosted Comms (4)
• Pursuant (2)
= 66 Points

Gozanti Cruisers (23)
• Comms Net (2)
= 25 Points

Gozanti Cruisers (23)
= 23 Points

Squadrons:
• Maarek Stele (21)
• Colonel Jendon (20)
• Dengar (20)
• Ciena Ree (17)
• Howlrunner (16)
• Mauler Mithel (15)
• Black Squadron (9)
= 118 Points

Total Points: 394

Sloane-Avenger. Will win the squadron engagement most of the time, but is vulnerable to tabling due to the few number of non flotilla ships.

Activations: 5
Deployments 7.5

Gil Surepi
Faction: Imperial
Commander: Admiral Motti

Assault: Most Wanted
Defense: Contested Outpost
Navigation: Solar Corona

ISD Kuat Refit (112)
• Strategic Adviser (4)
• Boarding Troopers (3)
• Electronic Countermeasures (7)
• Leading Shots (4)
• Assault Proton Torpedoes (5)
• Avenger (5)
= 140 Points

Gozanti Cruisers (23)
• Comms Net (2)
= 25 Points

Gozanti Cruisers (23)
• Comms Net (2)
= 25 Points

ISD Cymoon 1 Refit (112)
• Admiral Motti (24)
• Intel Officer (7)
• Gunnery Team (7)
• Spinal Armament (9)
• XI7 Turbolasers (6)
= 165 Points

Squadrons:
• 4 x TIE Interceptor Squadron (44)
= 44 Points

Total Points: 399

Double Motti-ISD. You’ll never take out both of those. And while you try they’ll hammer you. BT-Avenger can wipe almost anything of the board, and that Cymoon will eat your tokens and hammer you into submission over time.

Activations: 5
Deployments: 6

Oscar Bernard Beltrano Silao
Faction: Imperial
Commander: Grand Admiral Thrawn

Assault: Targeting Beacons
Defense: Planetary Ion Cannon
Navigation: Solar Corona

ISD Kuat Refit (112)
• Grand Admiral Thrawn (32)
• Governor Pryce (7)
• Boarding Troopers (3)
• Electronic Countermeasures (7)
• Leading Shots (4)
• External Racks (3)
• Avenger (5)
= 173 Points

Gladiator I (56)
• Ordnance Experts (4)
• Engine Techs (8)
• Assault Proton Torpedoes (5)
• Demolisher (10)
= 83 Points

Gozanti Cruisers (23)
• Comms Net (2)
= 25 Points

Squadrons:
• Bossk (23)
• Maarek Stele (21)
• Mauler Mithel (15)
• Dengar (20)
• Colonel Jendon (20)
• Zertik Strom (15)
= 114 Points

Total Points: 395

Thrawn with Demolisher + Avenger. Only three activations, but Pryce will help out. Jendon-Steele can handle smaller ships mostly by themselves. Vulnerable to tabling with only two capital ships.

Activations: 3
Deployments: 6

Sebastian Lundin
Faction: Imperial
Commander: Admiral Sloane

Assault: Advanced Gunnery
Defense: Fighter Ambush
Navigation: Superior Positions

Imperial II (120)
• Admiral Sloane (24)
• Governor Pryce (7)
• Darth Vader (3)
• Electronic Countermeasures (7)
• Leading Shots (4)
• XI7 Turbolasers (6)
• Avenger (5)
= 176 Points

Quasar Fire I (54)
• Captain Brunson (5)
• Flight Controllers (6)
• Boosted Comms (4)
• Pursuant (2)
= 71 Points

Gozanti Cruisers (23)
• Hondo Ohnaka (2)
• Comms Net (2)
= 27 Points

Squadrons:
• Black Squadron (9)
• Colonel Jendon (20)
• Maarek Stele (21)
• Dengar (20)
• Howlrunner (16)
• Valen Rudor (13)
• TIE Fighter Squadron (8)
• Mauler Mithel (15)
= 122 Points

Total Points: 396

Sloane Avenger. Squadron ball should win the squadron fight most of the times. Vulnerable to tabling. I’d be interested to hear how Vader worked out for Sebastian. It feels like Boarding Troopers would get more mileage with Avengers in most cases.

Activations: 3
Deployments: 7

Andreas Isaksson
Faction: Rebel
Commander: Admiral Raddus

Assault: Most Wanted
Defense: Contested Outpost
Navigation: Solar Corona

MC75 Ordnance Cruiser (100)
• Lando Carissian (4)
• Ordnance Experts (4)
• Reinforced Blast Doors (5)
• External Racks (3)
• Assault Proton Torpedoes (5)
• Profundity (7)
= 128 Points

Hammerhead Torpedo Corvette (36)
• Ordnance Experts (4)
• External Racks (3)
= 43 Points

CR90 Corvette A (44)
• Admiral Raddus (26)
• Turbolaser Reroute Circuits (7)
• Jaina’s Light (2)
= 79 Points

CR90 Corvette A (44)
• Turbolaser Reroute Circuits (7)
= 51 Points

GR-75 Medium Transports (18)
• Bright Hope (2)
= 20 Points

GR-75 Medium Transports (18)
• Quantum Storm (1)
= 19 Points

Squadrons:
• 6 x Z-95 Headhunter Squadron (42)
= 42 Points

Total Points: 382

Raddus bomb with a small fighter component and a large drop zone thanks to the two corvettes and two transports that can be used as origin points. Heavy bid because it really wants to go first.

Activations: 4/6
Deployments: 7/9

Patrik Thorén
Faction: Rebel
Commander: General Rieekan

Assault: Precision Strike
Defense: Contested Outpost
Navigation: Superior Positions

GR-75 Medium Transports (18)
• Bomber Command Center (8)
= 26 Points

GR-75 Medium Transports (18)
• Comms Net (2)
= 20 Points

MC75 Armored Cruiser (104)
• General Rieekan (30)
• Caitken and Shollan (6)
• Electronic Countermeasures (7)
• External Racks (3)
= 150 Points

Nebulon-B Escort Frigate (57)
• Flight Commander (3)
• Engine Techs (8)
• Yavaris (5)
= 73 Points

Squadrons:
• Shara Bey (17)
• HWK-290 (12)
• Gold Squadron (12)
• Wedge Antilles (19)
• Ketsu Onyo (22)
• Biggs Darklighter (19)
• Norra Wexley (17)
• X-wing Squadron (13)
= 131 Points

Total Points: 400

Closest to the classical Rieekan-aceholes, although Rieekan again have taken shelter on a large ship. Vulnerable to tabling if you can get through the squadron deathball.

Activations: 4
Deployments: 8

Kim Lee Christensen
Faction: Rebel
Commander: General Dodonna

Assault: Advanced Gunnery
Defense: Hyperspace Assault
Navigation: Dangerous Territory

MC80 Battle Cruiser (103)
• General Dodonna (20)
• Strategic Adviser (4)
• Caitken and Shollan (6)
• Medical Team (1)
• MS-1 Ion Cannons (2)
• Spinal Armament (9)
• XX-9 Turbolasers (5)
• Mon Karren (8)
= 158 Points

Nebulon-B Escort Frigate (57)
• Intel Officer (7)
• Projection Experts (6)
• Turbolaser Reroute Circuits (7)
= 77 Points

Nebulon-B Escort Frigate (57)
• General Draven (3)
• Projection Experts (6)
• Turbolaser Reroute Circuits (7)
= 73 Points

GR-75 Medium Transports (18)
• Adar Tallon (10)
• Comms Net (2)
• Boosted Comms (4)
= 34 Points

Squadrons:
• Luke Skywalker (20)
• Wedge Antilles (19)
• HWK-290 (12)
• Z-95 Headhunter Squadron (7)
= 58 Points

Total Points: 400

Artillery Dodonna. Just point and shoot. Interesting choice with projection Experts on the Nebs.

Activations: 5
Deployments: 6

Carl Cedergren
Faction: Rebel
Commander: General Rieekan

Assault: Most Wanted
Defense: Hyperspace Assault
Navigation: Navigational Hazards

CR90 Corvette A (44)
• General Rieekan (30)
• Turbolaser Reroute Circuits (7)
• Jaina’s Light (2)
= 83 Points

CR90 Corvette B (39)
• Engine Techs (8)
• Reinforced Blast Doors (5)
= 52 Points

Hammerhead Torpedo Corvette (36)
• Cham Syndulla (5)
• External Racks (3)
• Garel’s Honor (4)
= 48 Points

MC30c Torpedo Frigate (63)
• Lando Carissian (4)
• Ordnance Experts (4)
• Reinforced Blast Doors (5)
• Assault Proton Torpedoes (5)
• XI7 Turbolasers (6)
• Admonition (8)
= 95 Points

GR-75 Medium Transports (18)
• Bright Hope (2)
= 20 Points

GR-75 Medium Transports (18)
• Slicer Tools (7)
• Quantum Storm (1)
= 26 Points

Nebulon-B Support Refit (51)
• Turbolaser Reroute Circuits (7)
• Salvation (7)
= 65 Points

Total Points: 389

Rebel MSU with all the tricks. Large bid to go first. Seven activations and Admo for the heavy last-fist hammer. Salvation as an artillery piece. A CRAmbo, a TRC90, and a Chamerhead with ExRacks. Looks interesting, but will take some serious player skill to get all the tools working together.

Activations: 7
Deployments: 7

Victor Berglund
Faction: Rebel
Commander: Admiral Raddus

Assault: Most Wanted
Defense: Hyperspace Assault
Navigation: Dangerous Territory

MC30c Torpedo Frigate (63)
• Ordnance Experts (4)
• Assault Proton Torpedoes (5)
• Admonition (8)
= 80 Points

MC75 Ordnance Cruiser (100)
• Strategic Adviser (4)
• Ordnance Experts (4)
• Electronic Countermeasures (7)
• External Racks (3)
• Assault Concussion Missiles (7)
= 125 Points

MC80 Star Cruiser (96)
• Gunnery Team (7)
• Leading Shots (4)
• XI7 Turbolasers (6)
• Endeavor (4)
= 117 Points

CR90 Corvette B (39)
• Admiral Raddus (26)
• Jaina’s Light (2)
= 67 Points

Total Points: 389

Raddus with two big ones. Large bid to go first, and Raddus on a Jainas Llifeboat. I wonder if the plan is dropping the MC80, since otherwise that Strategic Adviser on the Ordnance Cruiser will never be useful.

Activations: 3/4/5
Deployments: 3/4

Joacim Hedblom
Faction: Imperial
Commander: Moff Jerjerrod

Assault: Most Wanted
Defense: Hyperspace Assault
Navigation: Solar Corona

ISD Kuat Refit (112)
• Moff Jerjerrod (23)
• Strategic Adviser (4)
• Boarding Troopers (3)
• Electronic Countermeasures (7)
• Leading Shots (4)
• External Racks (3)
• Avenger (5)
= 161 Points

Gladiator I (56)
• Captain Brunson (5)
• Ordnance Experts (4)
• Engine Techs (8)
• External Racks (3)
• Demolisher (10)
= 86 Points

Arquitens Light Cruiser (54)
• Dual Turbolaser Turrets (5)
= 59 Points

Arquitens Light Cruiser (54)
• Dual Turbolaser Turrets (5)
= 59 Points

Gozanti Cruisers (23)
• Comms Net (2)
= 25 Points

Total Points: 390

Jerry makes an appearance. No squadrons could leave the list vulnerable to bomber-lists, but both the kitted out Demolisher, and the BT-Avenger are ships to be feared. Fairly large bid, but not seriously I-must-go-first.

Activations: 6
Deployments: 5

Jeppe Nybo Jørgensen
Faction: Imperial
Commander: Grand Admiral Thrawn

Assault: Station Assault
Defense: Contested Outpost
Navigation: Superior Positions

Imperial I (110)
• Grand Admiral Thrawn (32)
• Strategic Adviser (4)
• Ruthless Strategists (4)
• Expanded Hangar Bay (5)
• Boosted Comms (4)
• Leading Shots (4)
• Quad Battery Turrets (5)
= 168 Points

Quasar Fire I (54)
• Boosted Comms (4)
• Squall (3)
= 61 Points

Gozanti Cruisers (23)
• Bomber Command Center (8)
• Boosted Comms (4)
= 35 Points

Squadrons:
• JumpMaster 5000 (12)
• Dengar (20)
• Tempest Squadron (13)
• 7 x TIE Bomber Squadron (63)
• Major Rhymer (16)
• Gamma Squadron (10)
= 134 Points

Total Points: 398

Another Thrawn build. Bomber heavy this time. Really bomber heavy. Rhymer is needed just to let all the bombers shoot at the same hull zone.

Activations: 4
Deployments: 9

Mats Uppström
Faction: Imperial
Commander: Darth Vader

Assault: Most Wanted
Defense: Contested Outpost
Navigation: Solar Corona

ISD Cymoon 1 Refit (112)
• Darth Vader (36)
• Strategic Adviser (4)
• Entrapment Formation! (5)
• Gunnery Team (7)
• Spinal Armament (9)
• XI7 Turbolasers (6)
= 179 Points

Arquitens Light Cruiser (54)
• Slaved Turrets (6)
= 60 Points

Arquitens Light Cruiser (54)
• Slaved Turrets (6)
= 60 Points

Gozanti Cruisers (23)
• Comms Net (2)
= 25 Points

Squadrons:
• 3 x VT-49 Decimator (66)
= 66 Points

Total Points: 390

Vader gives nice consistency to the seven red dice that the Cymoon can put out as well as the five that the Arquitens can drum up. Don’t know about the Decis. They’re durable and can punch rather hard, but being heavy means they wont stop an incoming bomber wing.

Activations: 5
Deployments: 5.5

Kevin Aabrink
Faction: Rebel
Commander: General Dodonna

Assault: Most Wanted
Defense: Capture the VIP
Navigation: Dangerous Territory

CR90 Corvette A (44)
• General Dodonna (20)
• Engine Techs (8)
• Turbolaser Reroute Circuits (7)
• Jaina’s Light (2)
= 81 Points

GR-75 Medium Transports (18)
• Comms Net (2)
= 20 Points

GR-75 Medium Transports (18)
• Slicer Tools (7)
• Quantum Storm (1)
= 26 Points

MC30c Torpedo Frigate (63)
• Lando Carissian (4)
• Ordnance Experts (4)
• Assault Proton Torpedoes (5)
• Admonition (8)
= 84 Points

MC75 Ordnance Cruiser (100)
• Strategic Adviser (4)
• Ordnance Experts (4)
• Electronic Countermeasures (7)
• Assault Proton Torpedoes (5)
• External Racks (3)
= 123 Points

Squadrons:
• 2 x A-wing Squadron (22)
• Shara Bey (17)
• VCX-100 Freighter (15)
= 54 Points

Total Points: 388

Light token shenanigan, but not with the classic farming objectives. With only one VCX it’ll probably want to go first with that bid.

Activations: 6
Deployments: 7

Philip Hertel
Faction: Imperial
Commander: Moff Jerjerrod

Assault: Most Wanted
Defense: Hyperspace Assault
Navigation: Solar Corona

ISD Cymoon 1 Refit (112)
• Moff Jerjerrod (23)
• Strategic Adviser (4)
• Entrapment Formation! (5)
• Gunnery Team (7)
• Quad Laser Turrets (5)
• XI7 Turbolasers (6)
• XX-9 Turbolasers (5)
• Relentless (3)
= 170 Points

Gladiator I (56)
• Skilled First Officer (1)
• Ordnance Experts (4)
• Engine Techs (8)
• Assault Proton Torpedoes (5)
• Demolisher (10)
= 84 Points

Gladiator I (56)
• Skilled First Officer (1)
• Ordnance Experts (4)
• Engine Techs (8)
• Assault Proton Torpedoes (5)
• Insidious (3)
= 77 Points

Raider I (44)
• Agent Kallus (3)
• Ordnance Experts (4)
• Quad Laser Turrets (5)
• Flechette Torpedoes (3)
• Instigator (4)
= 63 Points

Total Points: 394

Another squadless list, but with Instigatror and Kallus to try to do some mop up. The problem with Instigator being that Raiders tend to die fast versus squadrons. Only a six point bid, but a good objective mix. Demo can be effective as second player as well, and is a good hyperspace ship.

Activations: 5
Deployments: 4

Daniel Forsberg
Faction: Rebel
Commander: Admiral Ackbar

Assault: Advanced Gunnery
Defense: Fire Lanes
Navigation: Dangerous Territory

MC80 Assault Cruiser (114)
• Admiral Ackbar (38)
• Intel Officer (7)
• Engine Techs (8)
• Electronic Countermeasures (7)
• Leading Shots (4)
• XI7 Turbolasers (6)
• Defiance (5)
= 189 Points

MC30c Scout Frigate (69)
• Walex Blissex (5)
• Gunnery Team (7)
• Assault Proton Torpedoes (5)
• Admonition (8)
= 94 Points

CR90 Corvette A (44)
• Turbolaser Reroute Circuits (7)
• Jaina’s Light (2)
= 53 Points

GR-75 Medium Transports (18)
• Ahsoka Tano (2)
• Comms Net (2)
= 22 Points

Squadrons:
• 2 x A-wing Squadron (22)
• YT-2400 (16)
= 38 Points

Total Points: 396

Semi-fish farm. Lacks the VCX’s to really farm those tokens, and trades massive activations for useful activations. Low bid. Probably played Dangerous Territory all tournament.

Activations: 4
Deployments: 5.5

Daniel Phil
Faction: Imperial
Commander: Admiral Sloane

Assault: Precision Strike
Defense: Fighter Ambush
Navigation: Superior Positions

Quasar Fire I (54)
• Admiral Sloane (24)
• Flight Commander (3)
• Boosted Comms (4)
• Expanded Hangar Bay (5)
• Pursuant (2)
= 92 Points

Gladiator I (56)
• Ordnance Experts (4)
• Assault Proton Torpedoes (5)
• Demolisher (10)
= 75 Points

Gladiator I (56)
• Ordnance Experts (4)
• Assault Proton Torpedoes (5)
• Insidious (3)
= 68 Points

Gozanti Cruisers (23)
• Bomber Command Center (8)
• Expanded Hangar Bay (5)
= 36 Points

Squadrons:
• Maarek Stele (21)
• Colonel Jendon (20)
• 2 x TIE Defender Squadron (32)
• Gamma Squadron (10)
• Tempest Squadron (13)
• Soontir Fel (18)
• JumpMaster 5000 (12)
= 126 Points

Total Points: 397

Sloane bomber build. Drops the classic ISD for Demolisher and Insidious. Bomber build makes the objectives strong, since Precision strike can be used instead of the usually weaker Most Wanted, but doesn’t capitalise as much on Sloanes ability. Will have problems with the fighter heavy builds.

Activations: 4
Deployments: 7.5

Daniel Spahr
Faction: Rebel
Commander: Admiral Ackbar

Assault: Advanced Gunnery
Defense: Planetary Ion Cannon
Navigation: Solar Corona

CR90 Corvette A (44)
• Enhanced Armament (10)
= 54 Points

CR90 Corvette A (44)
• Enhanced Armament (10)
= 54 Points

MC80 Assault Cruiser (114)
• Admiral Ackbar (38)
• Electronic Countermeasures (7)
• Leading Shots (4)
• Quad Battery Turrets (5)
• Defiance (5)
= 173 Points

MC30c Scout Frigate (69)
• Gunnery Team (7)
• Turbolaser Reroute Circuits (7)
= 83 Points

Squadrons:
• Wedge Antilles (19)
• Tycho Celchu (16)
= 35 Points

Total Points: 399

Ackbar list that hopes to get positional advantage or possibly some bonus damage. Would have prefered TRC instead of Enhanced Armament on the CR90s. Can put out a hell of a lot of hurt on all ranges, but probably wants to stay at long range for better defence.

Activations: 4
Deployments: 5

Cristian Salinas
Faction: Rebel
Commander: General Dodonna

Assault: Most Wanted
Defense: Contested Outpost
Navigation: Dangerous Territory

CR90 Corvette B (39)
• General Dodonna (20)
• Leading Shots (4)
• Dodonna’s Pride (6)
= 69 Points

MC75 Ordnance Cruiser (100)
• Lando Carissian (4)
• Ordnance Experts (4)
• Electronic Countermeasures (7)
• Assault Proton Torpedoes (5)
• External Racks (3)
= 123 Points

MC30c Torpedo Frigate (63)
• Skilled First Officer (1)
• Ordnance Experts (4)
• Assault Proton Torpedoes (5)
= 73 Points

MC30c Torpedo Frigate (63)
• Skilled First Officer (1)
• Ordnance Experts (4)
• Assault Proton Torpedoes (5)
= 73 Points

GR-75 Medium Transports (18)
• Leia Organa (3)
• Comms Net (2)
= 23 Points

GR-75 Medium Transports (18)
• Ahsoka Tano (2)
• Comms Net (2)
= 22 Points

Total Points: 383

Tries to abuse Dodonna as much as possible, and really really wants to go first with that 17 point bid.

Activations: 6
Deployments: 6

Daniel Chis
Faction: Imperial
Commander: Admiral Sloane

Assault: Most Wanted
Defense: Planetary Ion Cannon
Navigation: Superior Positions

ISD Cymoon 1 Refit (112)
• Admiral Sloane (24)
• Minister Tua (2)
• Intensify Firepower! (6)
• Gunnery Team (7)
• Dual Turbolaser Turrets (5)
• Avenger (5)
• Electronic Countermeasures (7)
= 168 Points

Quasar Fire I (54)
• Flight Commander (3)
• Boosted Comms (4)
= 61 Points

Gozanti Cruisers (23)
• Comms Net (2)
• Suppressor (4)
= 29 Points

Gozanti Cruisers (23)
• Comms Net (2)
= 25 Points

Squadrons:
• Maarek Stele (21)
• Colonel Jendon (20)
• Ciena Ree (17)
• Howlrunner (16)
• Mauler Mithel (15)
• Saber Squadron (12)
• JumpMaster 5000 (12)
= 113 Points

Total Points: 396

Fairly classic Sloane aces. Uses the Cymoon for long range capabilities. A little bit outmatches in the mirror without Flight Controllers.

Activations: 4
Deployments: 7.5

Karl Forslund
Faction: Imperial
Commander: Moff Jerjerrod

Assault: Advanced Gunnery
Defense: Hyperspace Assault
Navigation: Superior Positions

Imperial II (120)
• Moff Jerjerrod (23)
• Quad Laser Turrets (5)
• Reinforced Blast Doors (5)
• Overload Pulse (8)
• Enhanced Armament (10)
• Avenger (5)
= 176 Points

Raider I (44)
• Ordnance Experts (4)
• Assault Concussion Missiles (7)
• Impetuous (4)
= 59 Points

Victory I (73)
• Expanded Hangar Bay (5)
• Heavy Turbolaser Turrets (6)
• Rapid Reload (8)
= 92 Points

Squadrons:
• Valen Rudor (13)
• Black Squadron (9)
• 6 x TIE Fighter Squadron (48)
= 70 Points

Total Points: 397

Jerjerrod with a lot of TIEs. Vic I may run into positional problems and not be entirely points effective, but it’s sturdier than a Quasar. The Raider would really like to last-first, but with only three activations that’s going to be hard.

Activations: 3
Deployments: 7
Sunday, November 4, 2018

Nordics 2018 - After action report part 6, ARE THOSE NEBULONS!?


My final opponent for Nordics was Kim. I see he's pretty active down in Coopenhagen, but we didn't play last time, so like Christian he was a new opponent.

He brought a rather unorthodox Dodonna list, comprised of 1 Liberty BC, 2 ESCORT (this is important later) Nebs, and a flotilla. He also had a HWK, Wedge, Luke, and... a mighty Z-95!

Jokes aside, those Nebs could have really crippled my squads, and only Bad Blue Diec Without Toryn (TM) saved my bacon. Because I read the list, looked at his fleet, but those Nebs were alt arts and my brain immediately assumed they were SUPPORT Nebs. Ok, I made another joke. My bad.

My point is, that couple with his squads, all that flak could become a real problem. And if you think those are support nebs, you might eagerly jump forward into a kill box of both nebs AND the GR-75. Which I totally did. But I'm getting ahead of myself.

He had made some last minute alterations to the list (with a pen, so I could see the old list as well). The old version had less SAdv and more Intel officer. For me it would have been much more dangerous, so I was happy enough.

So the list is a drill list. The MC80 just cuts through things. But without Intel Officer on the MC80 it needs to have additional firepower coming in to overcome big ships with ECM. Which the 2 Nebs excel at, so that part was OK.

What I didn't like about the list is the lack of engine techs. But that may be just personal preference. If the whole idea is to joust at red, maybe you don't need it. But I'm not convinced.

Overall I think Toryn Farr would be great for this list. Much more than Draven. And Adar is probably very, very nice vs squadless, but it seems paying 10 for him and 4 for boosted is overkill.

Anyway. I opted for 1st and picked his DT. I really like DT, more than most I think. But in this game I could not see how he would score too many points. He might be the two rocks on the right, but if he went for the station he'd score a token and run face first into the ISD. The other three obstacles were to the other side, and if he sent his GR down there, I would just quickly table him and the advantage would be slight.

Faction: Rebel
Commander: General Dodonna

Assault: Advanced Gunnery
Defense: Hyperspace Assault
Navigation: Dangerous Territory

MC80 Battle Cruiser (103)
• General Dodonna (20)
• Strategic Adviser (4)
• Caitken and Shollan (6)
• Medical Team (1)
• MS-1 Ion Cannons (2)
• Spinal Armament (9)
• XX-9 Turbolasers (5)
• Mon Karren (8)
= 158 Points

Nebulon-B Escort Frigate (57)
• Intel Officer (7)
• Projection Experts (6)
• Turbolaser Reroute Circuits (7)
= 77 Points

Nebulon-B Escort Frigate (57)
• General Draven (3)
• Projection Experts (6)
• Turbolaser Reroute Circuits (7)
= 73 Points

GR-75 Medium Transports (18)
• Adar Tallon (10)
• Comms Net (2)
• Boosted Comms (4)
= 34 Points

Squadrons:
• Luke Skywalker (20)
• Wedge Antilles (19)
• HWK-290 (12)
• Z-95 Headhunter Squadron (7)
= 58 Points

Total Points: 400

I set up with the Quasar parallell, facing towards my ISD who set up centrally and into the table. The Nebs faced down my ISD, with squads and GR for support. The MC80 was deployed further to the right, behind the objective rocks.

I set Pryce to 2 as in every other game, then we began or little dance. I avoided using Squall on round 1, to maybe get a little bit of surprise on r2. Many players can read the Squall card and think they got it, but the range of Squall +  Defenders is actually hard to imagine without being on the receiving end a few times.

He turned his Nebs and Gr towards the MC80, probably sensing the distance was a bit too large. Then the MC80 dropped to 0, to foul Pryce. This whole move had good intentions, and it really did prevent Pryce form triggering for max benefit.

It also cost Kim the game.

Round 2 my squads jumped forward. They quickly killed everything but Luke in a Squall attack. This is when I realized his Nebs were escorts... he had some really bad flak rolls from 2 Nebs AND 1 GR75 and Luke. He finally killed something, I think it was Valen, but it was much less than average.

He turned back into the fight oc and the Liberty geared up, but only to speed 1. When my ISD finally went, bombers and long rang guns boosted by Jonus took out 1 Neb and the flotilla.

Round 3 Luke went away and so did the final Neb and the ISD was in Mon Karren's face. 

Round 4 MK was still at speed 1, not double arced, but swarmed by angry bombers. With no Intel Officer the MK, despite all the upgrades, hardly made a scratch on the ISD paint job. 

Round 5... bombers and Liberty. We known what happens, right?

I got 1 token, he got 2. I lost 1 squadron. He got tabled. 10-1.

Kim realized his mistakes early on. His eagerness to avoid Pryce meant the Nebs were left to face the squads and ISD long range shots alone. So they were dead by the time with Liberty mattered. And by the time the Liberty was shooting, it was just a matter of time before it died. Just Maarek-Jendon is enough to cripple a Liberty facing down and ISD Avenger. Your redir gets discarded too quickly, and if u brace...well, Avenger gets you.

And that concluded my run.

It started a bit slow, with a 6-5, then a controlled 8-3 against Motti ISD (nearly impossible to get more), before I was able to really punish my opponents for the mistakes they made and go 10-1 twice in a row.

Total pts 34, which is 2 more than I won with last year.

Alas I was never able to catch up with Thomas, the winner, who also scored 10-1s in the two end games, and won with a massive 38! tourney points.

Saturday, November 3, 2018

Nordics 2018 - After action report part 5, ADMIRAL SLOANE, MEET MR. MIHTEL


My round 3 game was vs Sebastian and his Sloane aces fleet.

A potentially very difficult matchup, as 122 pts of Sloane is more than able to handle my 134 pts of Thrawn squads. Moreover, with hi having more activations than me AND Pryce, I would not have much advantage in the activation game, quite the contrary. Any round I use Pryce on, he can could set his Pryce after me, to the same round, thereby negating my advantage.

His squad selection was very good. He has almost the squads I used to run with Sloane, but oc doesn't have room for the full 134 pt Green Squad, so he's dropped Saber and Ciena for Black and a TIE. It's not as good oc, but it's good enough.

The only surprise here is Darth Vader. Most would take just take Boarding Troopers. I would, however, point out that Vader +  XI7 (or Sloane squads) does much the same. If Vader takes out ECM, the ISD-2 is more or less guaranteed to take out your Brace - if you haven't already lost it. And between Sloane squads and XI7 and Avenger... with Pryce Sebastian's ISD is is a mega-capable drill.

With the lack of Gunnery Team, a bold choice in and of itself, comes Advanced Gunnery. High risk, but also high gain. IF I were to take AG, and I'm not saying I will, this is the kind of list where it actually fits. Fun fact: I ALWAYS toy around with fitting AG in my ISD fleets, but ALWAYS bail out (no pun intended), bc the chances of me being 2nd player AND getting to really leverage AG is too small to warrant the high risk of this objective.

Faction: Imperial
Commander: Admiral Sloane

Assault: Advanced Gunnery
Defense: Fighter Ambush
Navigation: Superior Positions

Imperial II (120)
• Admiral Sloane (24)
• Governor Pryce (7)
• Darth Vader (3)
• Electronic Countermeasures (7)
• Leading Shots (4)
• XI7 Turbolasers (6)
• Avenger (5)
= 176 Points

Quasar Fire I (54)
• Captain Brunson (5)
• Flight Controllers (6)
• Boosted Comms (4)
• Pursuant (2)
= 71 Points

Gozanti Cruisers (23)
• Hondo Ohnaka (2)
• Comms Net (2)
= 27 Points

Squadrons:
• Black Squadron (9)
• Colonel Jendon (20)
• Maarek Stele (21)
• Dengar (20)
• Howlrunner (16)
• Valen Rudor (13)
• TIE Fighter Squadron (8)
• Mauler Mithel (15)
= 122 Points

Total Points: 396

My only real advantage was my double dials - and a bigger bid. So I opted for 1st and went with Fighter Ambush. When 2 fleets like this meet, there is a big chance few tokens will be scored. But I do, however, get to deny him the advantage of using squads for deployment advantage. The risk to me is low - no way he'll deploy far forward and risk an early strike. That's what you can do versus squad inferior lists. But not to a list like mine..

I set up like I have in many other games, with the Quasar parallel and facing towards the center, to one side, and the ISD centrally located. Sebastian deployed at low speed in a corner. We both set Pryce for 2. I didn't expect to get much use out of her. And that held true.

Nothing happened for 2 rounds, except ships gliding forward. Squads were kept carefully back, w/o using squadron activations. I got a good approach for my ISD, and it seemed Sebastian was a little too concerned with my Quad Batteries.

Then, at the very end of r2, in the squad phase, Sebastian made a single, small error. He forgot my Mauler hidden in the shadow of my ISD - unactivated. And so me moved his squads slightly forward, to what would be a good position for next round.

Then my Mithel hit 6 of his squads with splash damage. Only his Mithel and Maarek escaped /they were on an obstacle). Top of r3 Dengar Squalled towards the action, activated and freed Mauler... and splash again. When the Quasar was done, half of his squads were down, without any real damage to mine. The squad game, and hence the game itself, was decided by the Mithel double.

My ISD proceeded to double arc his ISD, with no good ways out. He slowed to 1 to avoid QBT and took out my ECM, but it was too late. His ISD was still double arced and I wasn't, so it died. His Goz died and all his squads died. I lost Tempest and Dengar. I got in a measly 2 tokens, none for him. The Quasar fled, but it was still 10-1.

It would be wrong to call it bad play on his part. He expertly moved his squads around in the early game. Just one little mistake and the snowball started rolling. It's a good example of how ridiculous game design Mithel.

Unfortunately I forgot to take any pics.

Thursday, November 1, 2018

Nordics 2018 - After action report part 4, WE MEET AGAIN MR. MOTTI


Round 2.

My second opponent was Gil, from Denmark, who I (narrowly) beat at last Nordics. He's a very solid player I must say.

In 2017 he ran an all-ship list of ISD, Dictor, Demo, and Goz. At the time this was an unusual list at the competitive level, but it was nevertheless quite potent. Between projection experts, repair commands - and a tractor beam - he actually managed to take out my ISD (really feeling the lack on gunnery teams last year). So he actually came the closes to beating me!

Motti dual ISD. Well, you can't really expect to take out both with a list like mine, not without unacceptable risk anyway. So you pick on the ISD that's the most exposed, which is probably the Kuat bc of its shorter range and boarding troopers.

Picking on a Kuat with BTA requires speed control. It can only flip 2 tokens, but its the brace that its after, so its bad enough, especially if the Cymoon is pouring fire at you from long range. Speaking of the Cymoon: Motti Cymoon wo ECM is not ideal, but with Spinal/XI7 AND Intel Officer, mixed with maybe Cf dial and definitely CF tokens, it WILL do good damage. Ideally the Kuar uses BTA, deads a ton of damage, then the Cymoon shoots and forces your to ditch the brace to save a few points. You really don't want this.

Fortunately I had the bid, so I could last/first with Pryce. The Sation is the obvious objective choice, as killing 1 Kuat, his squads, a Goz or two, and grabbing some late game tokens will give a 8-3, which is about as good as it gets vs this kind of fleet.

Faction: Imperial
Commander: Admiral Motti

Assault: Most Wanted
Defense: Contested Outpost
Navigation: Solar Corona

ISD Kuat Refit (112)
• Strategic Adviser (4)
• Boarding Troopers (3)
• Electronic Countermeasures (7)
• Leading Shots (4)
• Assault Proton Torpedoes (5)
• Avenger (5)
= 140 Points

Gozanti Cruisers (23)
• Comms Net (2)
= 25 Points

Gozanti Cruisers (23)
• Comms Net (2)
= 25 Points

ISD Cymoon 1 Refit (112)
• Admiral Motti (24)
• Intel Officer (7)
• Gunnery Team (7)
• Spinal Armament (9)
• XI7 Turbolasers (6)
= 165 Points

Squadrons:
• 4 x TIE Interceptor Squadron (44)
= 44 Points

Total Points: 399

I set my Quasar opposite the station, parallell to the edge and going towards the center, squads clustered for an early Squall/Defender strike. My ISD further to the right, where it could shift to avoid being pinned by 2x ISD, but without being too fare from the station.

Top of r1 my Squall throws Maarek, Defender and Jendon forward, activate them, and kill 3 of 4 Interceptors. Maarek double taps and takes a bit of counter, but I feel i have to do this. Can't have 4 Interceptors lurking in the back mid-game!

Quasar turns into the board to keep command range on Jendon so he can relay the Defenders to safety next round. The gamble pays off. Maareks braces keeps him alive at 1 hp after flak and TIE shots. I can then activate him and the Defender and get them to safety, while Valen takes care of the final interceptor. 

The Quasar takes some Cymoon fire bc of this bold move, and despite obstruction and Brunson takes some real damage. Curse you red dice! :-D

But it turns out Gil has mostly set repair commands on the Cymoon (the one on the left in the image), so it only gets 1 more shot at the Quasar, which it survives. The lack on early navs also keeps it down in speed and pointing the wrong direction so to speak.

Instead my ISD unloads bombers and red dice at the Kuat, moves forward, activates again, bombs and double arcs before going speed 3 around the outside. It does eat the boarding trooeprs from the side arc, and the dice are really, really hot, but damage is still nothing compared to a full front arc - or a double arc. 


The Kuat crumples to bombers right after. I wipe out both Gozanti and claim the final two round tokens for the station, so we go 4-2 in tokens. Score 8-3 to me, so I climb a bit on the ranking.

Gil wasn't 100% happy with his play, and I can understand this. He quickly discovered his errors during the game as I punished every little mistake. The reach of Squall + Defenders WILL catch you by surprise the first time you meet it. And a Thrawn 2-ship fleet is so incredibly agile you should set nothing but nav until you are sure it won't outflank you.

Next time Gil, next time you'll get me!

Wednesday, October 31, 2018

Nordics 2018 - After action report part 3, CURSE YOU NYM!!!


Over to actual batreps.

My r1 was Christain from Denmark. He ran a list of 134 of aceholes (or 7 aces and a generic HWK), MC75 and 2 flots. The MC75 build is really nice IMO. You get the BC, the FC and the Leading Shots on the MC75! This is a much tanker platform than the AF2, plus it can actually shoot for damage! BH/TF/BCC is in there, and Leia as slicer protection. Rieekan is on a HH lifeboat.

Very strong list, but NO FING YAVARIS!!! Which meant I could actually engage his squads early in the round wo being wiped out before I could activate top of the next round. That gave me hope, AND I decided I would try to lure him into attacking me with his squads, so I could jump them and get a head start.

He was 396 to my 393, so I actually had good use of my increased bid (I used to have 396). He had CO, which is picked, bc I will usually go at least 8-3 as 1st and playing that objective. I lets me set up and plot very good movement paths for my 2 ships.

I set my Quasar parallell to the board, as far forward as possible, then put down my ISD facing the station, and the squads clustered around. He countered with his HH opposite my Q, going the other way. 100% lifeboat! He then set his squads in front of the HH, protecting it from Squall tricks. A good play there, but it put them out of Toryn range (but in BCC range). His MC75 and flots started near the station, rolling slow.
Name: N18 Christian Aceholes
Faction: Rebel
Commander: General Rieekan
Assault:
Defense: Contested Outpost
Navigation:
Hammerhead Torpedo Corvette (36)
• General Rieekan (30)
= 66 Points
MC75 Armored Cruiser (104)
• Toryn Farr (7)
• Flight Controllers (6)
• Boosted Comms (4)
• Electronic Countermeasures (7)
• External Racks (3)
• Leading Shots (4)
• XI7 Turbolasers (6)
= 141 Points
GR-75 Medium Transports (18)
• Bomber Command Center (8)
• Boosted Comms (4)
• Bright Hope (2)
= 32 Points
GR-75 Medium Transports (18)
• Leia Organa (3)
• Comms Net (2)
= 23 Points
Squadrons:
• Dutch Vander (16)
• Gold Squadron (12)
• Norra Wexley (17)
• Nym (21)
• Shara Bey (17)
• Wedge Antilles (19)
• Luke Skywalker (20)
• HWK-290 (12)
= 134 Points
Total Points: 396
I decided I would rush forward to the station, which I normally don't. But in this case he started out very slow (speed 1) with his flots and MC75, so if I put pressure on him he would have trouble maneuvering without giving up critical squad commands.

The plan was good one, I think, but a little greedy. As I jumped my ISD to speed 3 in r1 and turned hard in, I jumped over my squads, protecting them. But the rebels would get some bombing runs on the ISD. But honestly, there was no avoiding this really, not without striking forward, which would have cost me most of my squads.

Oc Nym rolled a perfect crit. Brace gone. Not ideal, but with Nym+BCC I knew the risk was real enough. Still abit sad. Nym then blanked his black die, despite BCC. Two more black bombers managed to get double blanks, before Luke actually managed to fish for a HIT/CRIT. But if u discount the Nym crit I got off light.


Mega furball of doom. But We're in the shadow of my ISD, and I get to jump the rebels, plus activate 5 squads with FC Quasar top of next round. Even with Rieekan rebels start popping. I lose Mithel, and eventually Dengar, but rebel escorts go down and so does the HWK to Maarek, so it's game set match for the Imps int he squadron game.


I eagerly approcach the station, using my navs - and his lack of navs - to block up the MC75 front, giving me dbl arcs and him not. I'm pretty confident at this point. Squad game is going well, my ISD is well placed and his MC75 not, so despite the lack of a brace I should do OK. I just need to weather 1 front arc salvo with exracks, which should not be a problem.


Except it is... 10 damage, without any rerolls. Ouch. My ISD survives, but XI7 puts a lot through to my hull, and now I can't delay activating next round. I have to repair and shoot, before I die. That wasn't the plan at all :-D


In the end the MC75 finishes my ISD with a ram - and then immediately gets rammed dead by the Quasar after a bombing run. Thrawn Nav -  Squad is so OP! :-D

I lose my ISD and 3 squads. He loses the MC75, BH, and all his squads. He gets 3 tokens, I get 2, one unclaimed. It would be 3 to 2 if my Quasar hadn't been forced to speed up to do the ram, which would have pushed me up to a 7-4, rather than the 6-5 I got. But that wasn't possible, so 6-5 it was.

I was both happy and not happy with this game. I felt I had a good plan, but that in a sense dice hadn't been too kind to me. However, I did risk the Nym, and that's on me. Furthermore, the MC75 got lucky, but the rebels bombers sure didn't, so I guess it evens out. In the end I think the score is pretty fair and representative. And taking our 134 pts of aceholes with only light squad losses isn't something you can be unhappy about. Not against a really good player with a really good list. Well played Christian!