Showing posts with label Campaign. Show all posts

Monday, November 13, 2023

RitR Revisited - A Rebellion in the Rim supplement UPDATED v1.10


RitR Revisited has been updated to version 1.10.

CHANGELOG

V1.10: Updated to comply with Revised RRII (this is getting ridiculous, AMG—try playtesting a little next time). New layout/visuals. Some typo corrections and grammatical fixes (not highlighted).

Changes and additions in blue:

Fighter Group Leader restricted to max 3 squadrons per activation.

New options for random objective selection and reduced potency of veteran tokens.

Suggestions for additional anti-snowballing options added.

Tweaked the "Additional obstacles" option for Pivotal battles (remember that the final confrontation is also a Pivotal battle).

Added "Hyperspace reinforcements" option to the Final confrontation.

New alternate use for the Contain token, tweak for the Dodge keyword and added a new pass token option.

Various points adjustments (see points list for details).

Republic Arquitens changed to be more similar to the Imperial version (cost changed too).

Kit Fisto added as a replacement squadron (with scatter).

Grievous gets Intel instead of Grit (so his slaughter lambs can follow more easily).

Advanced Transponder Net, Avenger, Hot Landing, and Hyperwave Singal Boost were added to replacement upgrades.

Replacement Jyn Erso got a boost.

Obi-Wan (Delta-7) was replaced by Jedi Escort (partly to provide a non-Ace Delta, but also bc Obi + Axe + Implacable was proving to be a bit much). He might return later (although he doesn’t like flying). 

The following squadrons were significantly reworked (some other squads received minor tweaks): 

o Anakin (Twilight).

o All Eta-2 squadrons.

o Some further minor tweaks.


Thursday, June 22, 2023

RitR Revisited - A Rebellion in the Rim supplement


Do you like playing campaigns?

I do.

I’ve collected a bunch of house rules, customization ideas, and additional content for RitR that I want to share with the rest of the Armada community. I’ve also included some ideas for running RitR with Clone Wars factions and playing CC with RitR mechanisms.

Get it here.

Sunday, November 27, 2022

Return to the Rim (and the Corellian Sector)


I've collected a bunch of house rules and options for RitR that have sprung from the campaigns we've played (we're doing one right now but I don't have the energy to report from it). 

Also included is a way to run CC using RitR rules (custom map included).

I'm calling this version 0.95. If anyone has any feedback, feel free to PM me on Discord or send an email. A final version 1.00 should be out in the not-too-distant future.

RitR house rules

Corellian sector map

Tuesday, July 27, 2021

Rebellion in the Rim pt. 9 (Round 8/2nd and final pivotal)


We finally wrapped up our RitR campaign by making the 2nd pivotal the final battle. People were pretty much fed up playing the same lists over and over against the same lists over and over. 

Observation: if teams don't attack enemy bases, each act has too many rounds. And 3 pivotals are 2 too many. In this regard, the number of battles in CC is much, much better. I think we played 5 rounds and then had the final battle. With RitR we had 6 rounds and 2 pivotals and were still supposed to play 1 more act.

Anyway. Rebels managed to win the base assault (3rd battle of the last round) with a small margin. Something about an allied CR90 and some flotillas that just refused to die. This loss took away our ally source. I'm confident we could have gotten it back next round but since we went directly for the final assault that didn't happen. It brought our scores close, 11-10 Empire-Rebel. And with Rebels guaranteed to do a Demo of Force, we could at best get a small win. Kind of weird that only the assaulting team can score more than 1 point. Another little RitR quirk.

It also so happened that we hadn't really read the rules all that well, so we were a little surprised when the Rebel team triumphantly declared they now could use TWO ally tokens (as if ally tokens aren't OP, to begin with). One to upgrade a large ship. And one for the regular ally effect. That felt a little gamey - and very much like a clever trick to get an advantage.

But whatever. We grumbled a little but went ahead with the battle. We used our Shipyard token to upgrade to larges. Mostly for fun. The VSD turned into an ISD. That was a pretty good conversion. I dumped some squads and both flots to take a near-naked Onager. Without superweapons. The Testbed was the only large I could afford lol.

Rebels went with 2 small-hunting Liberties for their large upgrades. A very good tactic IMO. The battlecruiser in particular was loaded to pick our puny ships to pieces (in the actual battle it would contribute absolutely nothing at all).

EMPIRE R8 (2nd pivotal)

Fleet: Where Did All The Gozanti Go?
Commander: Commodore Drok Lodt (BJØRN)
Abilities (6): Master Navigator I (flagship), Master Coordinator I (flagship), Ion Techs (fleetwide), Ordnance Expert (fleetwide)
XP: 1
Conditions: None

Assault: Most Wanted
Defense: Abandoned Mining Facility
Navigation: Infested Fields

Gladiator I (56) [FLAGSHIP] [VET]
• Skilled First Officer (1)
• Ordnance Experts (4)
• External Racks (4)
• Demolisher (10)
= 75 Points

Onager Testbed (96)
• Ordnance Experts (4)
= 100 Points

Raider I (44) [VET]
• Instigator (4)
= 48 Points

Squadrons:
• Maarek Stele (21) [VET]
• Colonel Jendon (20) [VET]
• TIE Interceptor Squadron (22)
= 52 Points

Total Points: 275/275

Fleet: Dat New ISD
Commander: Fleet Captain Lex Ander (ALEXANDER)
Abilities (6): Master Gunner I (flagship), Master Navigator I (flagship), Ion Tech (fleetwide), Ordnance Expert (fleetwide)
XP: 1
Conditions: None

Assault: Most Wanted
Defense: Contested Outpost
Navigation: Infested Fields

Imperial II (120)
• Expert Shield Tech (5)
• Gunnery Team (7)
• Linked Turbolaser Towers (7)
= 139 Points

Arquitens Light Cruiser (54) [VET]
• Expert Shield Tech (5)
• Linked Turbolaser Towers (7)
= 66 Points

Gozanti Cruisers (23)
• Comms Net (2)
= 25 Points

Squadrons:
• Howlrunner (16) [VET]
• Soontir Fel (18) [VET]
• TIE Interceptor Squadron (22)
= 45 Points

Total Points: 275/275

Fleet: Never Got To Fully Pimp My Ships
Commander: Flotilla Commander So Tham (THOMAS F)
Abilities (6): Ambush Gunner II (fleetwide), Ion Tech (fleetwide), Master Engineer II (fleetwide)
XP: 5
Conditions: None

Assault: Opening Salvo
Defense: Contested Outpost
Navigation: Infested Fields

Arquitens Command Cruiser (59) [FLAGSHIP] [VET]
• Reinforced Blast Doors (5)
• Dual Turbolaser Turrets (5)
= 69 Points

Arquitens Command Cruiser (59) [VET]
• Expert Shield Tech (5)
• Dual Turbolaser Turrets (5)
= 69 Points

Raider II (48) [VET]
• Iden Versio (6)
• Disposable Capacitors (3)
• Heavy Ion Emplacements (9)
= 66 Points

Squadrons:
• Ciena Ree (17) [VET]
• Valen Rudor (13) [VET]
• Tempest Squadron (13)
• TIE Interceptor Squadron (11)
= 54 Points

Total Points: 258/275

REBELS

Eirik (261/261)
Commander
- Master Gunner III
- Ion Tech
- Master Navigator I
[flagship] MC80 Liberty Battle Cruiser (103)
- Intel Officer (7)
- Linked Turbolaser Towers (7)
- XI7 Turbolasers (6)
- Sensor Team (5)
= 128 total points
CR90 Corvette A (44) (V)
- Jaina's Light (2)
- Ezra Bridger (3)
- Turbolaser Reroute Circuits (7)
= 56 total points
GR-75 Medium Transports (18)
- Bright Hope (2)
- Comms Net (2)
- Ahsoka Tano (2)
= 24 total points
Squadrons (53/263):
1x Millennium Falcon - Lando Calrissian (23) (V)
1x Kanan Jarrus (19) (V)
1x A-Wing Squadron (11)

2nd Expeditinary Fleet (274/200)
Rebels - Author: CTS
- Squadron leader
- ion tech
- squadron group leader II
Assault Frigate Mark II B (72)(V)(Flagship)
- Reinforced Blast Doors (5)
- Adar Tallon (10)
= 87 total points
GR-75 Medium Transports (18)
- Wedge Antilles (4)
= 22 total points
GR-75 Medium Transports (18)
- Bomber Command Center (😎
- Ray Antilles (7)
= 33 total points
Squadrons (132/200):
1x Norra Wexley Y-wing Squadron (17)(V)
(S) 2x Y-Wing Squadron (20)
1x Y-Wing Squadron (10)
3x X-Wing Squadron (39)
1x Moldy Crow - Jan Ors (19)
1x Scurgg H-6 Bomber (16)
1x A-Wing Squadron (11)

Name: Roosh flying circus
Faction: Rebel
Commander:
- Master Engineer I
- Ion Tech
- Ambush Gunner II
- Infiltration I
CR90 Corvette A (44) (V)(Flagship)
• Hondo Ohnaka (2)
• Turbolaser Reroute Circuits (7)
= 53 Points
CR90 Corvette B (39)
• General Draven (3)
• Reactive Gunnery (4)
• SW-7 Ion Batteries (5)
= 51 Points
MC80 Star Cruiser (96)
• Expert Shield Tech (5)
• Auxiliary Shields Team (3)
• Spinal Armament (9)
= 113 Points
Squadrons:
• Corran Horn (22) (V)
• Hera Syndulla (28)
• A-wing Squadron (11)
• Rogue Squadron (14) (V)
• E-wing Squadron (15)
= 90 Points
Total Points: 307 (inkl Ally token for command ship upgrades)


NOTE: The MC80H1 model is a LIBERTY. The AF1 is an AF2.

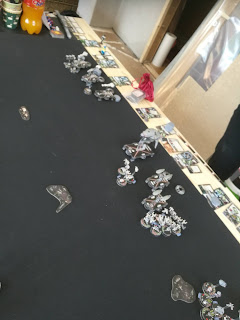
I don't have a ton of pics for this one. But this image from the start of round 3, before ships start popping says it all. Rebels set up in two separate groups, thinking they could lure the ISD out of the fight and also take down our dual Arq/raider fleet quickly and then sweep into our flank.

We were very happy to see the rebel bomber ball in the corner! The ISD/ARQ/Goz combo, along with most of our squads should be able to deal with them decisively, if supported by my Instigator. It was also pretty obvious the rebels had (again) spread out too much and would be tail-chasing much of the game.

Overall we had the better deployment and the better plan. During the game, we did some things right and some things not right at all. 

Some key points:

1. Our 2 Arqs + Iden-Raider jumped from speed 1 to 3 first round, leaving a big portion of the Rebel fleet out of the fight for the entire game...

2. The Onager used a dust field and its speed to FLANK the Liberties 💪 and do quite a bit of damage before going down. Pleased with that one.

3. Insitgator jumped in at the right moment and did Instigator-things. Some spot-on squad play sealed the rebel bombers' fate. Also real pleased with that one.

4. Demolisher changed its mind. Instead of going right to make sure the potato died, it ended up boxed in by the Onager, forced to stay slow, and eventually getting killed by rogue squads, a TRC90, and the BC in turn 6. I think we need to go back to 2015 to find Demolisher play THAT bad 😅😅😅

5. Wedge officer + Demo being stupid let the AF circle around and live (with 2 hull, no shields, and no defense tokens). Should have put the ISD further to the right, but the obstacle you see in the pic kind of precluded that.

In the end, we lost a bunch of squads, Demo, and the Onager, plus the brave Arq in the right corner. Rebels lost 2 CR90s, the Star Cruiser, and a ton of squads. In all, we won by less than 20 points. But a win is a win. Got us 1 more CP, for a 12-10 total.

And that's it. RitR was fun some of the time, tedious at other times. The strategic rules have a lot of interesting ideas but the overall finish isn't polished. Overall, RitR left me with a bad taste in my mouth and I hope I'll never have to play an unmodified version EVER AGAIN. CC isn't nearly as deep but RitR is so deeply flawed I need a separate blog post to talk about it all...

Friday, July 2, 2021

Rebellion in the Rim pt. 8 (Round 7/3rd battle Act 2)


I've finally caught up with our current status: we're in the middle of the 3rd battle of act 2. Two battles have been played. The third looks like it has big trouble actually scheduling AND playing. Incompatible schedules and whatnot have played a major part in dragging out this campaign for far too long. I had hoped the smaller battles would speed things but, but actually, RitR has had slower progress than CC.

The score for this act was 3-3 before this round, 9-7 total. We've won 2 1-point battles this round, so it's 5-3 and 11-7 total. But Rebels have an assault on Mandalore so could score 3 points if they win while we only get 1 if we win. Whatever the result is it'll lead to the 2nd pivotal.

After my last win, I upgraded with ExRacks on both combat ships. So now my fleet is pretty much where I want it to be. The combination of 4 activations, Demo, ExRacks, lots of rerolls and Maarek-Jendon is not a combo that the rebel small-mediums can reliably handle. With Instigator, Fighter Group Leader, 4 Ints, and RHBs I can win any squad fight. So if I want to just win (and there is not much incentive for doing much more in RitR) I pick off a CR90 or something and sweep squads.

In other news, Alexander finally got a win which we coupled to a squadron base reward, so now he has 3 Ints and 1 TIE to go with Howl and Fel.

Assault 1: AF/CR/GR fleet attacks Endor. VSD defends with Destiny. Empire win, helped by some hot-hot-hot AS dice on the Empire's part.

Assault 2: Demolisher attacks Nar Shadda. I guess we need a Repair Yard (that's not also an ally generator) for the final battle so Nar Shadda it is. Defended by rebel mixed fleet. Empire win.

Assault 3: Rebel squad-mania attacks Mandalore base with their ally token. Out dual Arqs 'n Raider defends with the ally token. Squadron defense objective. Not played yet.

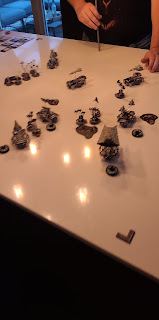
We forgot to bing mats so we played on a white, slippery table 😅 Setup was different this time: Demo on the outside, Goz, and Raider on the inside. Keeping squads close until I'm ready bc of his rogues.

Early game

The CR90B in the top-right part of the image hasn't moved yet. I now suddenly realize that it will face a last-first of Demo + Maarek/Jendon. Last-first isn't needed. Thanks to Maarek stripping 4 shields and ExRacks it pops to the last.

After this, I could have been more aggressive, killed another CR, possibly the Neb even. But there was no point risking anything. The win was mine, and the rebel player would repair everything (or nearly anything) no matter how much I killed, so pointless. 


End

From the other side of the table. I've lost a few ints...and a Gozanti (top right) is headed for oblivion. I was tricked by the lack of a mat and it sailed off the table in round 5 or so. And I worked really hard to save that Goz by activating it first during a previous round. We laughed hard 😂😂😂


Thursday, July 1, 2021

Rebellion in the Rim pt. 7 (Round 6/2nd battle Act 2)


Bases and presences start r6

This round took place a while ago but I haven't posted about it bc reasons. Bases were built and presence stickers placed but tbh team Empire didn't put a lot of thought into the process.

I forgot to mention in my previous post that the fleet cap was to 275 points for Act 2 (and 300 for act 3). Obviously a house rule. Why? Bc RitR is an incredibly dull and unbalanced campaign system, where you immediately max out your fleet with squads (and if you don't, you'll lag behind) and have also maxed out commander abilities before the first pivotal. We already increased the abilities to 6 tiers but that was only a slight speed bump.

Anyone who tries to tell me that RitR is better balanced than CC will get hit by the nerf-bat. CC doesn't always make a whole lot of sense but RitR is just as bad or worse in its own way. Playtesting must have been minimal at best and whoever designed this must have little experience with strategy games, to begin with.

I got Demo before the pivotal and have enjoyed that title. Now I have 3x Reserve Hangar decks to give my 4 Ints a second lease on life. I've been forced to take Fighter Group Leader to compete with the Rebel MAXIMUM squads list. That wasn't the plan at all but I refuse to be steamrolled by squads. My 2 companions are lagging behind on squads bc they have both lost games and chosen non-squad rewards.

Assault 1: Rebel mixed fleet attacked Smugger's Run and was opposed by the VSD fleet (destiny tokens are great for VSDs btw). Empire managed a win.

Assault 2: Our duo-Arq attacked Atollon with an ally token, defended by the potato+trc90+gr75 fleet. The idea is to give my teammates the opportunity to both attack and defend and try out playing with allies. No hugging that stuff bc I'm the more experienced player. Minor win Rebels.

Assault 3: Rebel squad spam, with ally, vs me. Rebel played used token for CR90A. With Ion Techs that's not a bad choice as it gave him activation parity. This turned out to be super-valuable and I must say probably a lot smarter than just having even moah squads that he'd probably not be able to command well.

Setup

Setup was conventional. I intended to screen with my raider/goz/squads and pounce with Demo as the opportunity presented itself. With nav I it can jump from 1 to 3 speed with a token. And as a veteran it can conjure tokens at will.

We played Precision Strike. Location objective. Hard vs Rebel bomber heavy but Maarek-Jendon in PS can be mean too.

Round 2

But look, the rebel player has a plan. AF going all-in at speed 2. Where are my squads? They are on the right flank not appreciating the danger to the flagship. Demo gets a good attack run on the AF.

Round 3

Where did Demo go? Oops, it died 1st activation turn 3. Too many bombers, a lucky crit, but mostly overconfidence/lack of a plan on my part.

In the end I managed to claw my way back out of the hole. Instigator was in a good position and started popping squads. Even w/o the flagship my Ints added to the carnage. I got to use all 3 RHD and all 4 Ints eventually died. But by the end ALL rebel squads were dead save Norra, the AF2 was no more (Maarek/Jendon + the crit where you can't redirect if shields are down in that zone) and the BCC flotilla went down as well. 6-5 to me in tokens and a decent-sized win.

Tbh the rebel deserved to win this one. He had the ally token, I did not. he had a plan, I did not. But I'm a savvy squad player and refused to give up despite the loss of the flagship.

End of this round we're at 3-3 in points for this act. So 1 more round, then a pivotal.

Tuesday, June 29, 2021

Rebellion in the Rim pt. 6 (Round 5/1st battle Act 2)


It's been a while since last I updated our RitR campaign. Progress has been sooo slow I've lost a bit of interest. Here is a brief summary of Round 5 (1st battle Act 2). 

Tuesday, April 27, 2021

Rebellion in the Rim pt. 5 (Round 4/1st Pivotal)

My name is Hermoine

Due to Covid restrictions (among other things) the was a huge delay between this pivotal and our previous game. Not ideal but we make do!

We met early on a Saturday a couple of weeks ago (that puppy and my new job is the reason I haven't been able to post this before) for our first pivotal: Demonstration of Force, Rebels assaulting. I think it took about 6 hours all told, with the squad game slowing things down by a lot from r3 and out.

The Fleets

Fleets haven't changed that much but Rebels now have Adar to make the squad madness even worse 😅 and both non-squad fleets have Ion Techs (ouch).

Our duo-Arq fleet has EST on both ships and Iden on the Raider. This is VERY useful. It still suffers from a lack of dice mods so Ion Techs (totally OP) is next on the list). The VSD fleet has dice mods but not yet any EST. And both those fleets REALLY need more squad protection. Even 1 more Int would make it better. Preferably some RHD too (that goes from me as well). My only fleet picked up Demo last turn. Demo + Maarekdon...that's a lot of ship-killing ability.

EMPIRE


STRATEGIC TOKENS
Ally: 2
Destiny: 1
Resources: 4
Skilled Spacers: 1

###

Fleet: Why So Many Gozanti?
Commander: Commodore Drok Lodt (BJØRN)
Abilities: Master Navigator I (flagship), Ordnance Expert (fleetwide)
XP: 2
Conditions: None

Assault: Most Wanted
Defense: Abandoned Mining Facility
Navigation: Infested Fields

Gladiator I (56) [FLAGSHIP] [VET]
• Ordnance Experts (4)
• Demolisher (10)
= 70 Points
Raider I (44)
• Ordnance Experts (4)
= 48 Points
Gozanti Cruisers (23)
= 23 Points
Gozanti Cruisers (23)
= 23 Points
Squadrons:
• Maarek Stele (21)
• Colonel Jendon (20) [VET]
• 4 x TIE Interceptor Squadron (44)
= 85 Points
Total Points: 249

###

Fleet: Dat Ole VSD
Commander: Fleet Captain Lex Ander (ALEXANDER)
Abilities: Master Navigator I (flagship), Ion Tech (fleetwide)
XP: 2
Conditions: Low Fuel

Assault: Most Wanted
Defense: Contested Outpost
Navigation: Infested Fields

Victory I (73) [FLAGSHIP] [VET]
• Veteran Captain (3)
• Linked Turbolaser Towers (7)
• Harrow (3)
= 86 Points
Arquitens Light Cruiser (54)
• Skilled First Officer (1)
• Linked Turbolaser Towers (7)
= 62 Points
Gozanti Cruisers (23)
• Comms Net (2)
• Suppressor (4)
= 29 Points
Squadrons:
• Soontir Fel (18) [VET]
• Howlrunner (16)
• TIE Interceptor Squadron (11)
= 45 Points
Total Points: 222

###

Fleet: Pimp My Ships
Commander: Flotilla Commander So Tham (THOMAS F)
Abilities: Master Engineer II (fleetwide)
XP: 2
Conditions: None

Assault: Opening Salvo
Defense: Contested Outpost
Navigation: Infested Fields

Arquitens Command Cruiser (59) [FLAGSHIP]
• Expert Shield Tech (5)
= 64 Points
Arquitens Command Cruiser (59)
• Expert Shield Tech (5)
= 64 Points
Raider II (48) [VET]
• Iden Versio (6)
• Disposable Capacitors (3)
= 57 Points
Squadrons:
• Ciena Ree (17) [VET]
• Valen Rudor (13) [VET]
• TIE Interceptor Squadron (11)
= 41 Points
Total Points: 226

REBELS

Tokens: 2x resource, spynet, ally, 2x skilled spacers, Repair yard.

Eirik (235)
Commander abilities
- Master Gunner I
- Ion Technician
XP: 2

Objectives: Asteroid Tactics, Surprise Attack, Minefields
.
(V) [flagship] Assault Frigate Mark II B (72)
- Skilled First Officer (1)
= 73 total points
(V) CR90 Corvette A (44)
- Jaina's Light (2)
- Intel Officer (7)
- Turbolaser Reroute Circuits (7)
= 60 total points
GR-75 Medium Transports (18)
- Bright Hope (2)
- Comms Net (2)
= 22 total points
Squadrons (80/200):
1x Millennium Falcon - Lando Calrissian (23)
1x Kanan Jarrus (19)
1x HWK-290 (12)
1x VCX-100 Freighter (15)
1x A-Wing Squadron (11)
.
.
Roosh flying circus. 214
Comnander master eng I, Ion technician, Infiltration I
Xp 1

Objectives: Surprise Attack, Abandoned Mining Facility, Solar Corona
.
(V) Nebulon-B Support Refit (51)
- General Draven (3)
- Auxiliary Shields Team (3)
- Spinal Armament (9)
= 66 total points
CR90 Corvette A (44)
- Turbolaser Reroute Circuits (7)
- Hondo Ohnaka (2)
= 53 total points
CR90 Corvette B (39)
- SW-7 Ion Batteries (5)
- Reactive Gunnery (4)
= 48 total points
Squadrons (47/200):
(V) Corran Horn E-wing Squadron (22)
1x Rogue Squadron X-wing Squadron (14)
1x A-Wing Squadron (11)
.
.
2nd Expeditinary Fleet (249/200)
Rebels - Author: CTS
Commander Tomakak
Master coordinator II
Xp: 3

Objectives: Capture the VIP, Precision Strike, Infested Fields
.
Assault Frigate Mark II B (72) (V)
- Adar Tallon (10)
= 82 total points
GR-75 Medium Transports (18)
- Bomber Command Center (😎
= 26 total points
GR-75 Medium Transports (18)
- Comms Net (2)
= 20 total points
Squadrons (121/200):
1x Norra Wexley Y-wing Squadron (17) (V)
1x Y-Wing Squadron (10)
2x Y-Wing Squadron (20) (scarred)
3x X-Wing Squadron (39)
1x Moldy Crow - Jan Ors (19)
1x Scurgg H-6 Bomber (16)

Demonstration of Force

Both sides spent 1 ally token. We took our staple 3xYV-666 and Rebels took 3xYT-1300. The 1300s were taken, I think, with Jan Ors in mind. Plus the 2400s die fast to YVs. But they never got anywhere near Jan so it didn't really help much.

We (Empire) didn't have much of a plan going into this pivotal. The only bit that we were going to focus on was not spreading out too much. 

I put my stuff down to one side, but not all the way to the edge. My squadrons, including 3xYV-666 went on the inside so they could move centrally if needed to support the rest of the Empire battle group. Both Gozanti at speed 2 aimed at squadron commands. Raider to support squads with flak. Demo (with Nav I) lurking at speed 1 ready to jump forward. And this time I'd keep Jendon-Maarek in reserve.

The VSD fleet was placed in the middle with the Arq on the left flank. Squads to the left with the Gozanti ready to command them. We still need more squads in that ball. Howl + Int + Soontir is just a minor speed bump - at best.

Our dual-Arq+Raider-II fleet on the far left. But by "far" left I mean just a little bit to the left not all the way left. Deployed to either go wide to the (far) left to lure away some rebel ship or to curl inwards and present a total of 3 Arq broadside to the approaching enemy.

Rebels put their main squad fleet in the middle facing the VSD. Their "mixed" fleet with Neb+2xCR90 facing our duo-Arq, but deployed much further out (even after using Infiltrator + Spynet token). Facing my Demo-group was 1 AF, 1 TRC90 (JL), and BH backed by a squad ball augmented by the 1300s.


Rebels moving their first ship of the day.

My battle group augmented by YVs.

Our center-left. Arqs are angled slightly to the left but being Arqs they can quickly curl right and present their combined broadsides.

Closeup of rebel left flank facing my Demo. For some reason, Bright Hope is heading away and both rebel combat ships are clumped together.

View of rebel center and right flank. They are spread out too much. The same thing happened in CC.

Closeup of rebel chief of staff's hands. A most cunning and sinister plot is afoot!

Early r1. Ships are edging forward.

Left flank perspective. Clearly shows how the rebels are way too spread out.

Forgot to take pics for a little while...Demo & Maarekdon murderer poor Jaina's Light. The tiny corvette should have taken cover behind the AF or gone wide. Instead it was an easy target that popped too soon.

The rebel right flank was doing fine and close to killing the Arq flagship. Then THIS WILD ROLL HAPPENED. 8 dmg on 4 reds...rerolling with Evade...another double. The chance of that happening is...very small. Dead CR90 --> Arq flagship that managed to limp into hyperspace.

This is after the TRC90 died. That potato is heading into red dice hell. Rebel squads waste time killing some Howl/Soontir/Int and make only a half-hearted bombing run on the VSD.

Overview. I think this is start r4. Rebels activate something...

...Maarek setting up Demo.

Poor Ints. We need RHD bad.

Die rebel scum!

Potato gone. Neb in trouble. If not for the 8-damage roll that flank would have developed very differently.

Demo pounces. The AF2 (AF1 model) is nearly dead at this stage. The VSD fleets Arq actually kills two potatoes in this game, both on 1 hull. Talk about being served by your allies 😅

End state. Rebels are hunted down to (almost) the last man. The CR90B makes it out alive. As do Rogue squad and Mr. Jarrus. Both achieve veteran status by running for the hills. Every other rebel squad is destroyed.

The Empire loses 2 flotillas and a handful of squads. Massive 410 MoV victory for us, earning us a ton of extra XP. Go Empire!

In many ways, the Rebels lost at setup. They did exactly the same things as when we played the final assault in CC: spread out too much. We delayed engagement in the center/our left while I used my striking power to hammer the rebel flank. Only after 1/3 of the rebel fleet was out of action did the main battle begin. Rebels squads were too slow to engage and not focused enough (hard when both potatoes die and no other combat ships nearby). The final flank was pretty much decided by a single dice roll. Instead of a tough fight, the rebels lost their TRC90 to bad luck and the Arq limped away into hyper on 1 hull and no shields. But even barring that dice roll Empire would have won by a good margin. But not 410 MoV good.

Next up is act 2!

Monday, March 22, 2021

Rebellion in the Rim pt. 4 (Round 3)

Let's look at the 3rd campaign turn:

The Fleets

Nothing much has changed. We still have trouble handling the squad-heavy Rebel list and think it's a bit silly but we're not complaining. Much. I've temporarily maxed out my fleet on squads but I've planned to tone it down a bit. Or at least I want to. Not sure I can, given the number of squads in a certain rebel list...

My allies have their defensive aces and now 1 TIE Int each 😅 The Arq+Arq+Raider fleet won a green objective last turn and now comes with Iden and 1 EST. The Arq+VSD+Goz fleet could only afford Vet Captain and SFO.

Wednesday, March 10, 2021

Rebellion in the Rim pt. 3 (Round 2)

Round 2 map

Things are getting interesting. Let's dive into turn 2 of RitR!

The Fleets

We needed more squadrons, so we got more squadrons. I won, so 2 Ints and 1 TIE for me. My fellows could afford no more than 1 Int each. Ouch. Double ouch when you see the potato + squads list taking another X-wing and a Scurrg. It's a legit fleet. The best of all 3 rebel task forces. But it's already at 111 pts of squads. None of my fellow commanders can handle that. So what do we do? We send my fleet and use the ally token and hope for the best. The rest of the rebels also got more squads but they aren't as extreme.

Tuesday, February 23, 2021

Rebellion in the Rim pt. 2 (Round 1)


BASES

When picking bases my team (Empire) decided we wanted a Squadron location. Montross became a natural first selection. For our 2 final picks, we wanted A) maximum base coverage in terms of sectors and B) Resource tokens (for base building).

Rebels then went for Mon Cala first. 

We picked Mygeeto. It's kind of a shitty place but it has a Resource and it's in the same sector as Mandalore. Also, if the Rebels had any Peltas, we could block access to Fleet Commands. That could be relevant in 400-point games but maybe not as much at 200.

Rebels went Sullust.

We got Mustafar. Mostly because it's in sector V and has a Resource, but also bc the double Arq fleet needs access to turbolaser upgrades. I suppose controlling access to Fleet Support is an added benefit but I don't think it'll matter this time around.

We noted down our base defenses but I'm not going to list them here. Bothan spies you know 😏

Round 1 map

ASSAULTS

Rebels sent their AF+squads list against Concord Dawn. We defended with VSD+Arq. This did, somewhat predictably, end with a Rebel win. VSD went down and Arq + Gozanti fled. Not a lot of damage on the Rebel side. It's a bit unfortunate that Rebels choose a skew list. Winning at Concord just made it worse. None of my fellow commanders have any hope of handling it, so we'll just try and match me against it every round. Sigh.

I sent my fleet against Mandalore. Opposed by Neb + TRC90 + CR90B. We played his Abandoned Mining Facility. I parked behind the dust field and milked it, forcing him to come to me. Being 1st player and out activating him, I was also to destroy most of his fleet losing only the Raider and Jendon. 12 to 5 in tokens for me.

The final assault was Potato + TRC90 (always tons of TRC90s) against Nal Hutta (predictably). We defended with dual Arqs + Raider-II. Those Arqs lack dice fixing which proved their undoing. A minor win for rebels. But that's all it takes.

Saturday, February 6, 2021

Rebellion in the Rim pt. 1 (The fleets)


A couple of weeks ago we finished the Corellian Conflict All-out assault which I thought was grand. I really like big battles! 

But several other players wanted something smaller, less complex. While I'd rather play with big boy fleets, I can see their point. Armada is pretty a complex game and for less experienced players it can feel a little overwhelming.

Now we're back with another campaign and this time we're trying Rebellion in the Rim. Five out of six players are the same and people are sticking to their factions. What loyalty 😅 The Empire team has gained a new player.

My RitR experience is limited. I tried it very briefly on Vassal - without reading the campaign rules - when it came out. I made the mistake of going with an ISD for my fleet. It wasn't that it was bad. It was strong. But it was boring. A single shooty ship and 2 flots...bah. And too few squadrons. So I suggested we stick to smalls and mediums and we did.

Regarding aces: Since the game caps at 250, you can only ever have two unique squads with defense tokens. I think that suits the RitR concept perfectly!

Special rules: We didn't want to change too much without having played the campaign but agreed to the following:

  • No round 1 base assaults.
  • Commanders can have up to 6 tiers of abilities. Should they get beyond that stage, they could trade in 1 XP for a 5 point increase to their fleet cap. No idea how that'll work out. We'll see.
  • If you gain multiple conditions or have a condition when you gain another, the opposing player picks what condition you keep. So no flying around with Low Fuel to protect yourself from other conditions!

Sunday, January 24, 2021

Corellian conflict, All-out assault, pt. 3 (The Battle)


I've got some images from the battle that I'll add for flavor, but to better give an overview of events, I've recreated the battle using Vassal. Showing, in broad strokes, what happened. I think that's a more educational approach. Keep in mind that this report is done from memory. Ship positions etc. are approximations. Same with speeds. I've made no attempt to track damage in detail or show commands. Squadron positions are just an indication of where stuff happened when, and individual squads may have died prior to actually being removed from the simulation.

Imperial battle plan: Since our Motti player wouldn't be attending, we would put his fleet in the middle and share control of it. Since I'm the more experienced player, that pretty much meant I ran it for the better part of the game, or poor Romodi would be completely overwhelmed.

Sloane would set up on one flank, using the Onager and squads to clear the opposition, quickly going to speed 3 and hitting the enemy center from the flank mid-game, hopefully around the time they crushed into Motti and their squads were already tied up.

Romodi would go on the other flank, but not too far away. Indeed, using the whole table was out of the question, as it would make us unable to support one another. Thus, Romodi's Sovereign Cymoon plopped down next to Motti's Chimaera, and between them, they'd keep us fed with IF! and whatever other Fleet Command we might need (we ran ET! turn 2, maybe also 3, then went to STM!). The rest of Romdoi's ships set up to form a screen against the approaching flankers.

TL;DR: Motti would be the Anvil. Sloane the Hammer. And Romodi the sacrificial lamb.

Sloane's ISD-2 started in Hyperspace with Maarek-Jendon, planning to drop out of hyper r2 to herd the rebel ships into squads and Onager ignition arc. Motti put Harrow and Demo into hyper. The VSD would be perfect to launch mid-game where it could bring its offense to bear without being the no. 1 punching bag early on. Demo was the perfect counter to rebel ships dropping in behind our lines (a big worry). Romodi kept the Kuat in hyper, planning to drop it behind Sato's lines as soon as he was heavily engaged.

You know what? We actually stuck to the plan...

Corellian Conflict, All-out assault, pt 2 (Rebel Fleets)


Our opponents for the final battle were these three rebel fleets, all of them just shy of 500. Keep in mind it's only round 5! Agate has about 20 pts less than the other two, due to a lucky long-range shot with my Onager against a scarred flotilla.

The rebels have had a clear advantage in squads since round 1 - with the exception of my Sloane fleet once I had points for actual squads - and mercilessly used it to kill an astonishingly large number of ISDs. I think every battle Motti and Romodi were in, they lost an ISD, plus lesser stuff.

In large hulls, however, the Imperial side greatly outweighed the rebels. The final battle is 7 rounds long, but burning down FOUR ISD, one Onager, one Vic, and more seemed an impossible task with the threat of Sloane's squads swooping in the dismember bombers trying to clear Motti and Romodi's TIE Int screen.

On to the actual lists:

Friday, January 22, 2021

Corellian Conflict, All-out Assault, pt. 1 (Imperial Fleets)


Tomorrow I'll play the final Corellian conflict battle for the first time IRL. I've started the CC several times, both locally and online, but the campaign always fizzles...but NOT this time. We're only in round 5, but Imps (my team) have 10 CP (Rebels just 3) so we have to declare now, or we're sure to reach 12 and the campaign will be over without a mega-battle! 

The reason we have so many points: Rebel outposts on good systems. So the rebels grabbed a few hi-value systems early on, and we took them back, earning 2-3 CP each. Not optimal, but it's the first time playing the CC for most of us, so we need to play to learn.

In case you wonder: Rebels are in decent shape (they'll be featured in more detail in the next post). They are not maxed out at 500 like we are, but they are only a couple points short, except Agate which perma-lost a scarred GR-75 so she's 20 or so points behind.

On the Imperial side: GA Sloane (me), Romodi, and Motti.

On the Rebel side: GA Leia, Agate, Sato.

Note: Since we started before 1.5 landed, we've decided to finish using old rules and card costs. So old intel is in effect, same with evades, and everything else.

Monday, April 23, 2018

Vassal Corellian Conflict: Campaign blog, part 10 (round 4 battle and results)

Start of r5... Imperial presence in Corellia is waning...

I was finally able to get in my r4 gave vs Tokra's Ackbar fleet. Actually it was on Thursday. Today is Monday, so this report was slow in the making. I have been rather busy of late, but also I find my motivation to play Armada waning. That's directly related to me not going to Worlds (can't afford to this year, so I released my spot). Typically, without new releases on the horizons and no major tournaments, I find other things to occupy my time. The urge to play will return, it always does, but for now I'm light on Armada.

Anyway. For once I was the attacker, aiming for Corfai. The idea was that if we lost our Corellian base, that target of the only rebel assault this round, we'd be able to grab a system that would provide us with a good chunk of resources.

To recap, my fleet go tweaked slightly from last round. We decided to allow discarding upgrades, since it makes little sense to be able to discard a whole ship WITH upgrades (plus shift upgrades between ships) and not be able to get rid of an upgrade that isn't really working.

I refitted my ISD and Demo (both got scarred), plus all my squads, except the TIE, which I scrapped instead. I had too little command and control of my squads, so I figured that even if I ave up 1 deployment (I now have an odd number of squads), the addition of Expanded hangars on the Gozanti would make up for it.

Speaking of the Gozanti, I dropped Comms Net, which was seeing very little use. My combat ships are all Veterans now, so they have enough tokens. The raiders can only hold 1 a piece at any one time). Even the Cymoon can generate enough tokens to trigger the Fleet command like 4 times in a game, even wo/Comms.

Fleet Command got turned into Entrapment Formation! STM! wasn't a bad choice, but I've had so much fun with EF! in Monster Truck Mania, that I wanted to play some more with it.

Instigator got added to the Raider-1. Between Jamming Field and this title, I figured my squads would actually be worthwhile if I kept them between the Gozanti and Instigator.
Name: VCC New Vader r4
Faction: Imperial
Commander: Darth Vader
Assault: Most Wanted
Defense: Contested Outpost
Navigation: Dangerous Territory
ISD Cymoon 1 Refit (112)
• Darth Vader (36)
• Minister Tua (2)
• Entrapment Formation! (5)
• Gunnery Team (7)
• Quad Battery Turrets (5)
• XI7 Turbolasers (6)
• Devastator (10)
• Electronic Countermeasures (7)
= 190 Points
Gladiator II (62)
• Captain Brunson (5)
• Ordnance Experts (4)
• Engine Techs (8)
• Assault Proton Torpedoes (5)
• Demolisher (10)
= 94 Points
Raider II (48)
• Disposable Capacitors (3)
• Heavy Ion Emplacements (9)
= 60 Points
Raider I (44)
• Ordnance Experts (4)
• External Racks (3)
• Instigator (4)
= 55 Points
Gozanti Cruisers (23)
• Jamming Field (2)
• Expanded Hangar Bay (5)
= 30 Points
Squadrons:
• Lambda Shuttle (15)
• Captain Jonus (16)
• Valen Rudor (13)
• Zertik Strom (15)
• Saber Squadron (12)
= 71 Points
Total Points: 500
The Ackbar fleet is pretty much the same as when I met it previously, but with a few more upgrades. In particular Strat Adviser on Home One seemed significant, as it gave Tokra a 6 to 5 in activations over me. Couple with 2nd player, he'd be able to get both H1 and the MC30 to go after all my ships had gone. Or he could delay his squadron-pushing flotilla, and together with Rogue squadrons go after all my squadron activations.

CC Ackbar R3 
Author: Tokra

Faction: Rebel Alliance
Points: 500/500
 
Commander: Admiral Ackbar

Assault Objective: Close-Range Intel Scan
Defense Objective: Contested Outpost
Navigation Objective: Dangerous Territory

[ flagship ] MC80 Command Cruiser (106 points)
-  Admiral Ackbar  ( 38  points) 
-  Home One  ( 7  points) 
-  Strategic Adviser  ( 4  points) 
-  Electronic Countermeasures  ( 7  points) 
-  Quad Battery Turrets  ( 5  points) 
-  Leading Shots  ( 4  points) 
= 171 total ship cost

MC30c Scout Frigate (69 points)
-  Intel Officer ( 7 points) 
-  Caitken and Shollan ( 6 points) 
-  External Racks ( 3 points) 
= 85 total ship cost

CR90 Corvette A (44 points)
-  Jainas Light  ( 2  points) 
-  Turbolaser Reroute Circuits  ( 7  points) 
= 53 total ship cost

CR90 Corvette A (44 points)
-  Turbolaser Reroute Circuits  ( 7  points) 
= 51 total ship cost

GR-75 Medium Transports (18 points)
= 18 total ship cost

1 Shara Bey ( 17 points) 
1 Corran Horn ( 22 points) 
1 Jan Ors ( 19 points) 
4 YT-2400s ( 64 points) 
= 122 total squadron cost

I was the assaulter and picked his Close-Range Intel Scan. Sure, he's farm some points, but it didn't give him any huge tactical advantages. Dangerous Territory was another option, but I've been playing 2nd player DT all campaign, so I wanted something different.

I forgot to start a log or take early images, but to summarize I setup on top, Admiral Snackbar on the bottom. He had Jaina's Light on the left, Home One and GR-75 centrally, MC30 and other CR90 to the right. I set up to the right hand side, with squads and Gozanti and Raider-1 and squads in the center, ISD slightly to the side so it could turn into the table, and Demo and the Raider-2 as flank security/activation padding.

Home One slow-rolled towards the sation, Jaina's Light sped up and curved in to flank me (in the image you can see her do her only shot of the game, towards my speed 0 raider's ass), the GR-75 sped up and then escaped into the void, far from any fighting. Meanwhile the other CR90 and the MC30 intercepted my ISD. They are not in the image, because they are already dead...

The CR90 had to block my Demo, to avoid it making a run on the MC30. But CR90s don't block as well as flotillas do, and it popped (but did prevent a side arc shot and forced Demo to do a double ram). 

After that things got awkward because of a dust field blocking the exchange of fire between the ISD and the MC30. I was able to keep in place with deliberate ramming, Tokra was forced to come over the dust becuase he'd dialed up a CF instead of a Nav (which would have seen him jump across to safety). And so the poor MC30 ate a full Vader front arc with XI7 at point-blank range.


Jaina tried to get away, but it had an awkward approach angle. A combination of rear External Racks shot from the Raider and a side arc from the Cymoon (boosted by Quad Batteries) sealed it's fate. Note how I've used EF! to drop my Raider-1 to speed 0. Ricky - but kept it out of Home One range. I also got good mileage out of my squads his game: they still died, but they kept the enemy squads occupied and allowed my to flak 2 YTs to death and nearly kill several more.


The final piece of action was my Raider-1 just surviving a parting shot from H1, jumping onto the station to heal back up, before stupid Corran Horn rogue bombed it in the ass for a nice Naturalist Damage and poof!

We called it there, as H1 went to hyper and the GR-75 was out of range (we play by the only rules, not the recent FAQ). Valen might have died, and a 2400 too, but we were both happy to just call it there.


I was pleased with the result. My setup and maneuver plan worked ok, as did the changes to my fleet and my use of squadrons to delay Tokra's nasty rogues. I was worried about his activation advantage, but was able to get the upper hand. A little bit of skill and a little bit of luck there (Tokra's CF dial at the wrong time). And also, MC30s with no Admo or Lando are quite fragile, so that definitely helped. 

Elsewhere in the sector: Sloane won her battle. Another bloodless affair. But we lost Corellia. MoV of like 5 or something, so very close. Also a bloodless affair. So I build a base at Corfai to compensate. Current score is Rebels 7 to imps 6.

Every fleet is now at 500 and players have money in the bank. Normally a team can't declare an all-out assault until it has 8 points, but we're talking about maybe doing the final assault next round. It seems kind of pointless to play another standard round. Nothing much will happen. But we haven't decided yet. But the assault will definitely happen very soon!